You're weeks from closing on a new Miami home, the builder says termite treatment is handled, and nobody can show you what was applied, where, or when. That gap matters. Good pest control for new construction isn't a spray you trust on faith. It's a timed sequence with records you can verify before slabs, drywall, and landscaping hide the evidence.
Table of Contents
- Termite Protection Methods Compared
- Pest Control Timeline Across the Build
- How to Pretreat Soil Without Breaking the Barrier
- Sealing Out Rodents, Roaches and Mosquitoes Before Drywall
- Early Sightings in a New Home and What They Mean
- What Pest Protection Costs in a New Build
- Closing Documents, Warranty Terms and Quote Requests
Termite Protection Methods Compared
Start by comparing methods on the same terms, because each one creates different proof.
| Method | How it works | Best fit | Requirement to verify |
|---|---|---|---|
| Liquid soil barrier | Termiticide applied to soil and foundation before finished grade | Slab and crawlspace homes | Labeled rate and five-year efficacy record |
| Bait system | Monitoring stations and baits carried back to the colony | Added monitoring or hard-to-treat soil | Monitoring schedule; outside the 95% standard |
| Treated wood | Preservative-treated lumber in framing and sill plates | Wood-framed structures | Treatment specified before framing; label on file |
| Stainless-steel mesh | Physical barrier at foundation and utility entries | Builders combining methods | Continuous at slab edges and penetrations |
What the federal standard actually requires
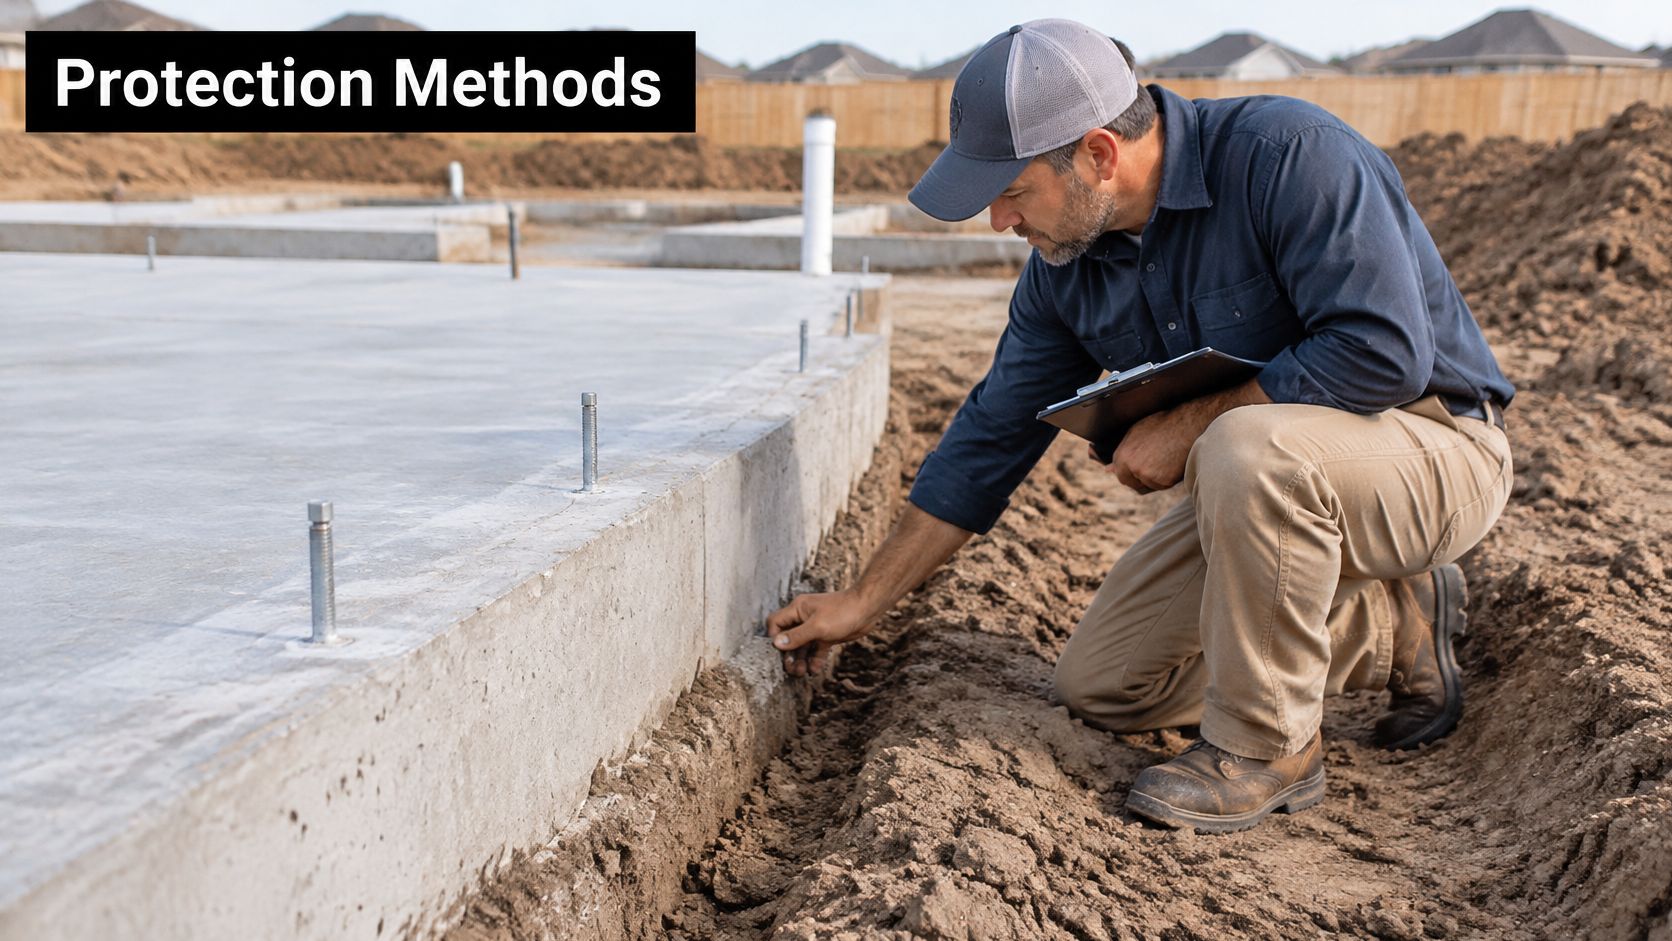
The U.S. Environmental Protection Agency termiticide registration framework requires structural termite-protection products, excluding bait systems, to demonstrate at least 95% prevention of wood damage for a minimum of five years. Soil-applied products should also demonstrate efficacy for at least five years, and preconstruction treatment means application before finished grade is installed.
That standard is where bait systems get misread. A bait plan isn't a failed liquid treatment, and it isn't held to that same 95% test. You judge it by different evidence, mainly the monitoring schedule, station locations, inspection dates, and what happens when termites hit a station. If a builder sells bait as set-and-forget protection, ask who monitors it after closing and how often. Without that service, you have plastic stations in soil, not an active program.
Liquid barriers remain the most common fit for Miami slab and crawlspace homes because applicators can treat exposed soil and foundation areas before concrete and finished grade block access. Their weakness is timing and disturbance. Once trenches, patios, or landscaping cut the treated zone, continuity breaks.
Treated wood shifts protection into the structure itself. It needs to be specified before framing, installed where the plan calls for it, and matched to its product label. Ask for the label and a material ticket, not just a line in a budget that says lumber package.
Stainless-steel mesh doesn't kill termites. It blocks them. That makes installation quality everything. A gap at a slab edge, a torn corner, or a loose seal around a pipe defeats the point, so photos before the pour matter more than a product brochure.
A method that can't be documented isn't a finished decision.
The decision rule to use
Ask three questions before concealment. Which method did the builder choose? Why does it fit this soil, foundation design, and framing? Where is that choice written down, with product, rate or material, treated area, and date?
I'd pick the method the builder can sequence correctly and prove, over a theoretically stronger method installed late and recorded poorly. In South Florida termite pressure, execution and paperwork are part of the protection.
Pest Control Timeline Across the Build
Use this schedule to track decisions and records through construction. If a phase passes without documentation, raise the gap before the work is concealed.
| Build phase | Pest-control action | Record to keep |
|---|---|---|
| Before excavation | Confirm termite method, code requirement, and licensed applicator | Written scope naming the method |
| After grading and backfill | Complete interior perimeter soil treatment after compaction | Product label, rate, treated area, and date |
| Before slab or under-slab plumbing | Complete pre-slab treatment where required by the chosen method; map penetrations | Treatment record and penetration plan |
| Framing and rough-in | Remove cellulose debris, repair leaks, and check utility entries | Dated photos and punch list |
| Pre-drywall | Check that planned pest-protection work is complete | Signed inspection sheet |
| Landscaping and irrigation complete | Confirm exterior pest-protection work is recorded | Completion record |
| Final inspection | Obtain and confirm acceptance of the Certificate of Compliance before occupancy | Certificate of Compliance and approval |
Before excavation, put the termite method, applicable code requirement, and licensed company in the written scope. A vague contract allowance leaves buyers and property managers with little to confirm when the work is complete.
After grading and backfill, document the interior perimeter treatment once compaction is finished. Before the slab, keep the treatment record with the penetration plan so the paperwork connects the application to the locations that need attention.
Framing and rough-in are the last convenient stages to record conditions before walls close. Keep dated photos of debris removal and repairs, alongside a punch list showing what remains unfinished. At pre-drywall, confirm that the pest-control scope has been completed and have the responsible parties sign the inspection sheet.
The planning approach for bespoke homes in the Phoenix metro illustrates the value of naming decisions in a build scope rather than leaving them to field improvisation. Apply that same discipline to pest work: identify the selected method, who is responsible, and what record will confirm completion.
At final inspection, the Certificate of Compliance should be issued and accepted before occupancy. Missing records can turn an early pest sighting into a warranty dispute over whether protection was installed, completed, or maintained.
How to Pretreat Soil Without Breaking the Barrier
A soil treatment can be applied correctly and still be compromised by the next crew. The protection depends on timing, careful work around treated areas, and records that show what happened at each stage.
The eight-step sequence
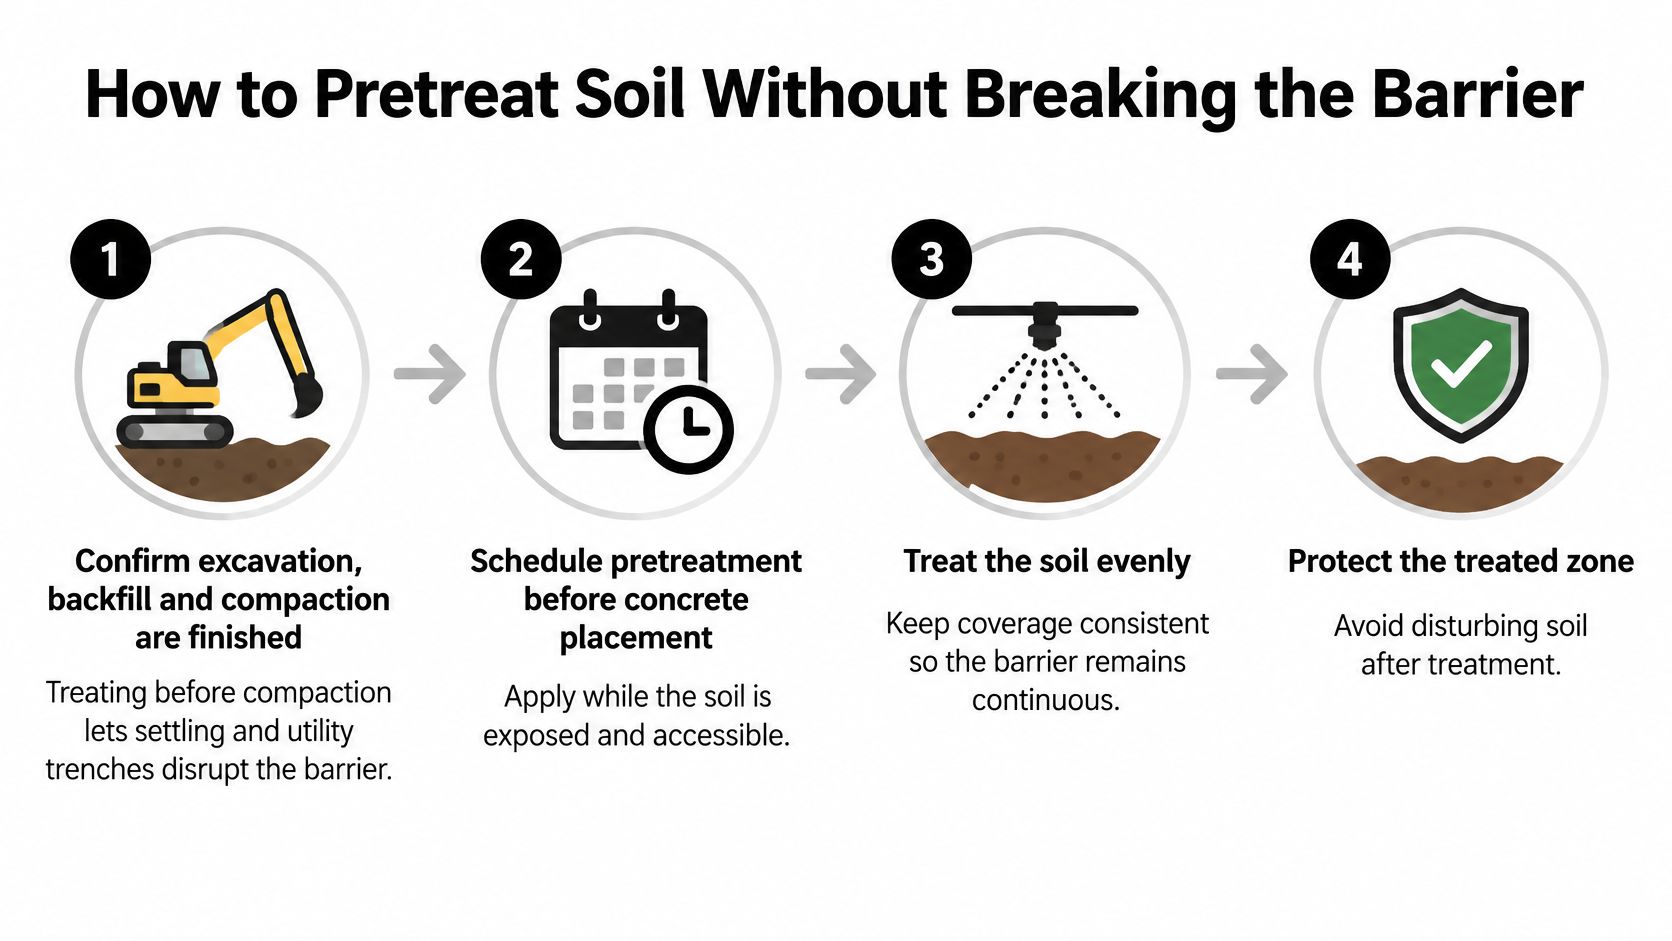
Finish excavation, backfill, and compaction first. The Florida Building Code chapter on soils and foundations supports applying interior perimeter soil treatment only after those steps are complete. Settling and utility trenches can disrupt treatment applied too early.
Remove concrete overpour and mortar along the foundation perimeter. Debris can obstruct treatment where it needs to reach the exterior foundation. Clear soil contact helps the application reach its labeled depth.
Apply the interior perimeter treatment at the labeled rate. Record the product, concentration, treated area, applicator, and date at the time of application. A generic invoice saying “pretreat” does not show what area was treated or how.
Protect treated soil with the materials and methods specified by the applicable product label and construction plans. If rain falls before the soil is protected, document the conditions and confirm with the applicator whether retreatment is needed. Keep weather observations with the treatment record.
Keep follow-on work out of the treated zone. Rebar chairs, plumbing adjustments, stakes, and foot traffic can puncture or displace treated soil. Photograph and locate any disturbance so the affected area can be addressed.
Apply the exterior vertical barrier after construction, initial landscaping, and irrigation are complete. Follow the product label and applicable requirements for the treatment extent. Installing the barrier too early increases the chance that landscaping or irrigation work will disrupt it.
Retreat disturbed soil promptly. A patio trench, regrading, or a replaced irrigation line can leave an untreated path. Record the affected area and retreatment date.
Refer to the closing file for the completed treatment and compliance records. Confirm that the file supports the Certificate of Compliance and that the building department has accepted it before a certificate of occupancy is issued.
Where crews usually break it
The common failure is scheduling treatment as a milestone, then allowing later trades to work through the treated soil without coordination. Align the pour sequence with the supplier of foundation concrete for new home construction, so formwork and overpour cleanup do not compromise the treatment. Concrete placement and termiticide timing need to be coordinated, even when separate companies handle them.
The record should match the site. If photos show a disturbance that the treatment log does not address, ask how and when that area was restored before accepting the handoff.
Sealing Out Rodents, Roaches and Mosquitoes Before Drywall
Before drywall closes the wall cavities, check what can enter them and what could attract pests later. The EPA's integrated pest management guidance recommends removing food, water, and shelter, and identifies sealing utility openings, repairing leaks, and installing barriers as practical controls. An open pipe chase can defeat a chemical treatment.
| Pest | Common entry or attractant | Fix during the build |
|---|---|---|
| Rodents | Openings around pipes, vents, and rooflines | Seal with metal flashing or cement; screen vents |
| Cockroaches | Moisture under sinks and drains; cardboard and food waste | Fix leaks, seal cracks, and clear debris daily |
| Mosquitoes | Standing water in forms, gutters, and low areas | Grade for drainage; remove containers and pooled water |
| Termites | Cellulose debris and buried wood near the foundation | Remove cellulose debris and buried wood; keep slab edges clear |
| Ants | Moisture around doors, windows, and wall irrigation spray | Install door sweeps, caulk gaps, and redirect sprinklers |
Match the material to the pest
Foam alone will not stop rodents. Pack openings with copper mesh or steel wool, then use sealant, metal flashing, or cement to close the gap. The guide to rodent exclusion materials and where they hold up explains how to choose materials by location. Protect vent screens from damage during finish work.
Roaches and ants follow moisture and food debris. Cap drains, fix rough-in leaks before cabinets conceal them, store workers' food waste in closed containers, and keep cardboard away from framed walls. Remove form boards, grade stakes, and scrap wood rather than burying them near the foundation.
Acceptance criteria for the walkthrough
A promise to spray at the end does not resolve an open entry point or a damp wall cavity. Check the work before drywall:
- Sealed penetrations: Every pipe, conduit, and vent entry closed with pest-resistant material.
- Dry structure: No active leaks, standing water, or wet wall cavities.
- Screened openings: Vents covered and intact; door sweeps touching the threshold.
- Clear perimeter: Cellulose debris removed and vegetation kept off the building.
- Written corrections: Each deficiency dated, photographed, and signed off.
Reinspect after utility work, grading, and irrigation installation. Those trades can reopen penetrations or disturb the perimeter. Keep the inspection notes and photos with the build records so the buyer or property manager can verify what was sealed before drywall concealed it.
Early Sightings in a New Home and What They Mean
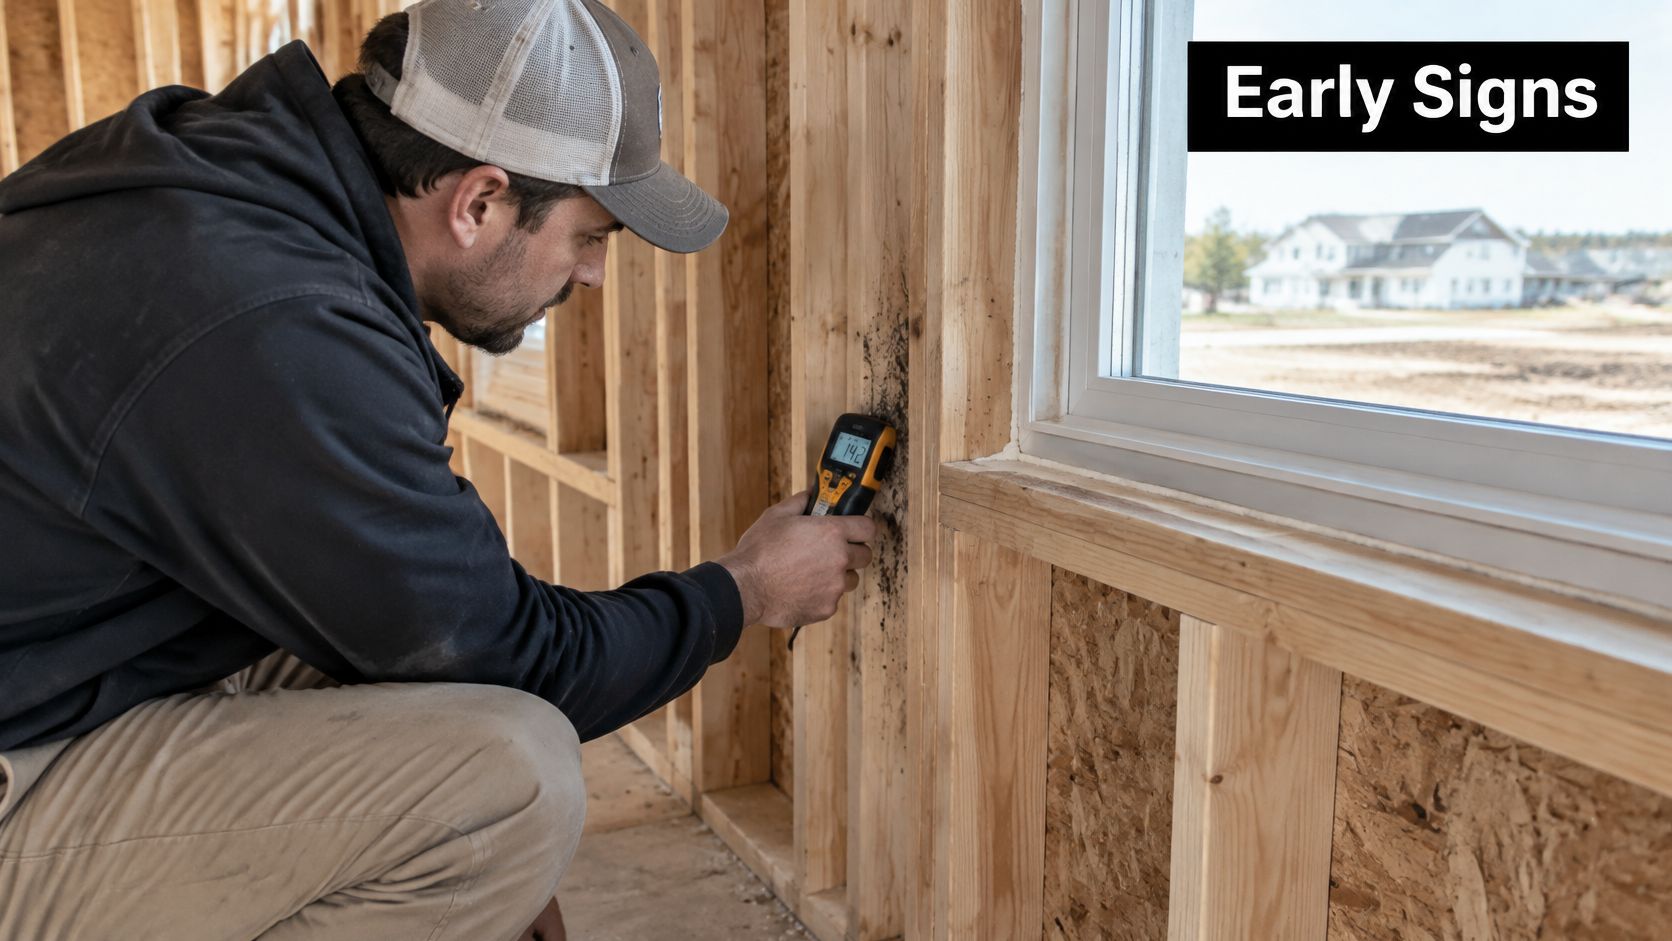
Tiny beetles on a windowsill or pale specks moving in a new bathroom unsettle buyers fast. In a brand-new home, they often signal construction moisture, not an established infestation or dirty housekeeping.
This moisture check on framing shows where that diagnosis starts.
Why new materials attract pests
University of California entomology guidance identifies new construction where green lumber may be enclosed before drying, and increased humidity in wall voids can support mold and attract fungus beetles and psocids. Condensation, roof or flashing defects, and plumbing leaks can also make enclosed areas favorable refuges for pests.
Psocids feed on mold, so killing the insects without drying the cavity leaves the food source in place. Fungus beetles tell a similar story. Disturbed soil can also push outdoor insects toward slab edges and door thresholds during the first weeks of occupancy. Identification matters because a moisture indicator species and a German cockroach demand opposite responses.
Watch how an inspector separates a moisture problem from a pest problem before recommending treatment.
A first 90 days decision tree
Work in this order before authorizing broad treatment:
- Identify the species from a sample in a sealed jar or a clear close photo with a coin for scale.
- Log location and timing, including room, surface, time of day, and recent rain or plumbing use.
- Check moisture in the affected wall base, slab edge, attic, and under nearby sinks with a pin meter or an inspector's probe.
- Inspect entry points, including door sweeps, weep holes, utility penetrations, and attic vents.
- Bring the builder in early with your log and photos, before a spray visit muddies responsibility.
Spraying around the foundation is the common reflex and usually the weakest fix for moisture-driven sightings. Drying, ventilation, drainage correction, flashing repair, and targeted sealing solve the cause. I'd spend first on finding water, second on closing gaps.
Without dated photos and a identified cause, the builder, homeowner, and pest company can each assume another party owns the problem.
Keep that log even when sightings stop. If they return after the first heavy rain, your dates and locations turn a vague complaint into a diagnosable pattern.
What Pest Protection Costs in a New Build
Compare quotes by their line items, not the total alone. Method, building footprint, follow-up visits, and the scope of records can all change what a bid includes.
The cost drivers
- Termite method: Liquid soil barriers, bait monitoring, treated wood, and stainless-steel mesh involve different material, labor, and follow-up costs. Baiting places more of the cost in monitoring; mesh requires careful installation.
- Footprint: Slab area and perimeter length affect termiticide volume, mesh length, and crew time. A sprawling one-story plan can cost more to protect than a compact two-story plan with similar living area.
- Exterior vertical barrier: This work may need a separate visit after landscaping and irrigation. Check whether the quote includes that return trip or bills it separately.
- Retreatment after disturbance: Utility trenching, patios, or regrading may require additional application. Ask for the rate before the work begins.
- Documentation: Check whether the price includes treatment records, dated photos, and the Certificate of Compliance. A quote can list the treatment visit and documentation as separate line items, making clear what the buyer receives.
- Recurring protection: The build treatment is separate from an annual termite agreement or monitoring plan. Compare them as separate charges so ongoing service is clear.
How to read a quote
Ask each bidder to itemize the method, product or material, treated area, number of visits, retreatment rate, records provided, and first-year inspection terms. The Florida termite treatment cost breakdown can help distinguish one-time build charges from ongoing agreement charges.
Quote rule: Require the bid to name the exterior barrier, any return visit, and the records supplied. If those items are absent, ask for a revised quote before comparing totals.
Request quotes while build phases remain open. After the slab is poured and walls are closed, protection options narrow and retrofits can cost more.
Closing Documents, Warranty Terms and Quote Requests
What happens if a termite problem appears after closing: who pays for treatment, and what paperwork proves the original work met its terms? The answer depends on the warranty and a clear handoff from builder to owner. Early sightings or missing records can turn that handoff into a dispute.
Match the warranty to the protection
Before signing, get these terms in writing:
- Length and coverage: Which termite types are covered, and does the warranty pay for retreatment, damage repair, or both?
- Exclusions: Can soil disturbance, additions, or missed inspections void coverage?
- Inspection duties: Who schedules and pays for inspections?
- Transfer terms: Does coverage transfer to a buyer, and what fee or paperwork is required?
Record construction changes made after treatment, such as patios, landscaping, irrigation, and new plumbing penetrations. They may disturb a soil barrier or create an untreated path. Ask the builder or treatment provider to document any follow-up treatment or explain in writing why none is needed. Clear handoffs can support strategies for lowering warranty volume.
An independent inspection can help assess protection at resale, when a warranty expires, or after a major remodel disturbs soil or opens walls. The goal is to establish whether the original treatment and warranty still fit the home's current condition.
Keep one closing record
The full file should include the Certificate of Compliance accepted by the building department, treatment dates, method, product and label, treated square footage, concentration and amount where applicable, retreatment entries, photos, and inspection approvals. Ask who keeps the originals, then obtain copies for the owner's records.
Under Florida's pest control statutes, preventive subterranean termite treatments must follow the pesticide label, and licensees must retain treatment records for three years. Those records include the property address, treated square footage, pesticide, concentration, and amount applied.
For condos, rentals, and HOA-managed buildings, keep a shared file for each unit and transfer it with the property. A protection history held only in a former manager's inbox may be hard to recover when a warranty question arises.
Request quotes while the work is accessible
Ask for written quotes that identify the termite method, product, treated area, visit sequence, and certificate timing. Check that the provider is licensed and insured. The guide to checking a Florida pest control license explains what to confirm.
Pestless connects Miami homeowners, buyers, and property managers with licensed, insured local providers. It does not perform treatments. Requests go to a licensed, insured provider serving the customer's area, and Pestless never refers unlicensed operators. A matched provider typically contacts the homeowner within 1 business hour during business hours to discuss the situation and provide a no-obligation quote. Use the conversation to compare scope and confirm what records the provider will supply before the slab and walls limit access.
Dealing with this pest right now?
Pestless connects you with a licensed, insured Miami pest control provider for a free, no-obligation quote.