You're probably reading this with a little tension in your shoulders. Maybe you saw a few wings on a window sill after a humid Miami morning. Maybe a buyer's agent asked for a WDO report before closing. Or maybe you just bought a house in Kendall, Hialeah, or Homestead and want to know what's going on behind the baseboards before small concerns turn into structural repairs.
That's a normal place to be. A termite inspection sounds dramatic, but the visit itself is usually calm, methodical, and more practical than people expect. In most Miami-Dade homes, the inspector isn't rushing through with a flashlight and a guess. A professional inspection is typically a full-property walkthrough that takes about 45 to 90 minutes for a single-family home, and larger or harder-to-access properties can take up to 2 hours according to this termite inspection overview.
What matters most is knowing what the inspector is doing, where they'll look, what they can confirm, and what they can't see without access. In South Florida, that process has its own rhythm because so many homes sit on slab-on-grade foundations, hold moisture year-round, and rely on a Florida-style WDO report when a sale or refinance is involved.
Table of Contents
- The Moments Before the Inspector Arrives
- Where the Inspector Goes Inside and Around the Home
- The Visible Signs Inspectors Are Trained to Spot
- Tools and Techniques That Turn a Look Into Evidence
- How the Written Report and Possible Outcomes Work
- Smart Questions to Ask Before, During, and After the Visit
- Miami-Specific Expectations and Your Next Steps
The Moments Before the Inspector Arrives
A common Miami scene goes like this. It's a weekday morning, the coffee is half-finished, and you're watching for a white pickup to pull in. You know termites are a real concern here, but you may not know whether this visit is going to feel like a major event or a simple walk-through.
In practice, the hour before arrival matters more than people think. The inspection usually goes smoother when the inspector can reach the edges of the house without having to ask you to move five things in every room. That doesn't mean deep cleaning. It means access.
Small prep steps that save real inspection time
If you want better answers, give the inspector a cleaner path to the high-risk spots:
- Open the perimeter: Open side gates, backyard gates, and any shed doors.
- Clear the garage edges: If your car is tight against the wall, move it so the inspector can see the inside perimeter and garage framing.
- Pull items off exterior walls indoors: Boxes, paint cans, stored bins, and packed closets can block the very places an inspector needs to see.
- Check attic access: If your home has a pull-down ladder, make sure it opens properly.
- Secure pets: Even friendly dogs slow the visit when the inspector is moving room to room with tools and notes.
If you want a fuller homeowner checklist before the appointment, this guide on how to prepare for termite inspection covers the basics well.
What to have ready at the door
Paperwork helps, especially in Miami-Dade real estate situations. If you have an older WDO report, prior treatment records, or notes about past leaks, keep them handy. If you know the year the home was built, that helps too. Older homes and newer slab-on-grade builds often present differently, especially around additions, utility penetrations, and garage transitions.
Practical rule: Don't try to pre-diagnose the problem before the inspector arrives. Just point out what you noticed, where you noticed it, and when.
That might be a soft door frame near a shower, wings near a sliding glass door, or recurring dampness around the garage wall after heavy rain. Those details help the inspector focus early, but they don't replace the walkthrough. A good inspection still follows the house, not just the symptom that caught your eye.
Where the Inspector Goes Inside and Around the Home
Most termite inspections in Miami-Dade follow a deliberate path. The inspector usually starts outside, then works inward, then checks upper or hidden spaces if they're accessible. It's a lot like any organized field visit where sequence matters, similar to a documented contractor service call process that begins with access, observation, and then findings.
The exterior usually comes first
On a slab-on-grade Miami home, the foundation line is one of the first places an inspector wants to see. They'll walk the perimeter and pay close attention to the seam where the slab meets stucco, siding, or other wall materials. That edge matters because subterranean termites often use concealed routes from soil to structural wood, and inspectors are trained to focus on risk points like the foundation line, sill plates, joists, and utility entry areas, as explained in this guide to termite inspection versus termite treatment.
Outside, they're also looking for conditions that support termite activity before obvious damage appears. Industry guidance notes that inspectors pay close attention to wood-to-ground contact, leaks, poor ventilation, standing water, and similar moisture issues because subterranean termites are often found where wood meets soil or moisture is present. That preventive focus is part of why inspections matter so much, especially since the U.S. Environmental Protection Agency has long noted that termites and other wood-destroying insects cause billions of dollars in property damage each year, as summarized in this overview of what a termite inspector does.
Then the route shifts indoors
Once the outside perimeter is covered, many inspectors move into the garage first. In Miami homes, garages often show useful clues because of stored moisture, wall penetrations, and framing around the door opening. From there, the inspector usually works room by room.
Common interior checkpoints include:
- Baseboards and trim: especially along exterior walls
- Door and window frames: where subtle damage can hide under paint
- Kitchen and bath cabinetry: because plumbing adds moisture
- Behind appliances: leaks don't always show from the front
- Closets against exterior walls: packed storage can hide damage
- Attic access: when present and reachable
- Crawl spaces or subfloor areas: less common here, but still part of the job when accessible
In a humid Miami bathroom, the inspector isn't only looking for termites. They're also reading the room for why termites would choose that spot.
That's where first-time homeowners sometimes get confused. They expect a search only for bugs. A real inspection also looks for the conditions that invite them. In South Florida, recurring moisture, slab-edge access, and hidden plumbing gaps often matter as much as the visible symptom.
The Visible Signs Inspectors Are Trained to Spot
On a Miami-Dade inspection, the job is to separate termite evidence from all the other things that can fool a first-time homeowner. On stucco homes built on slab, a stain near the baseboard may come from moisture, settlement, old repairs, or termite activity. The inspector is reading those clues in context, not just checking off a list.
What each sign usually means
Some signs point more strongly to termites than others, and in South Florida the type of clue can hint at the type of termite involved.
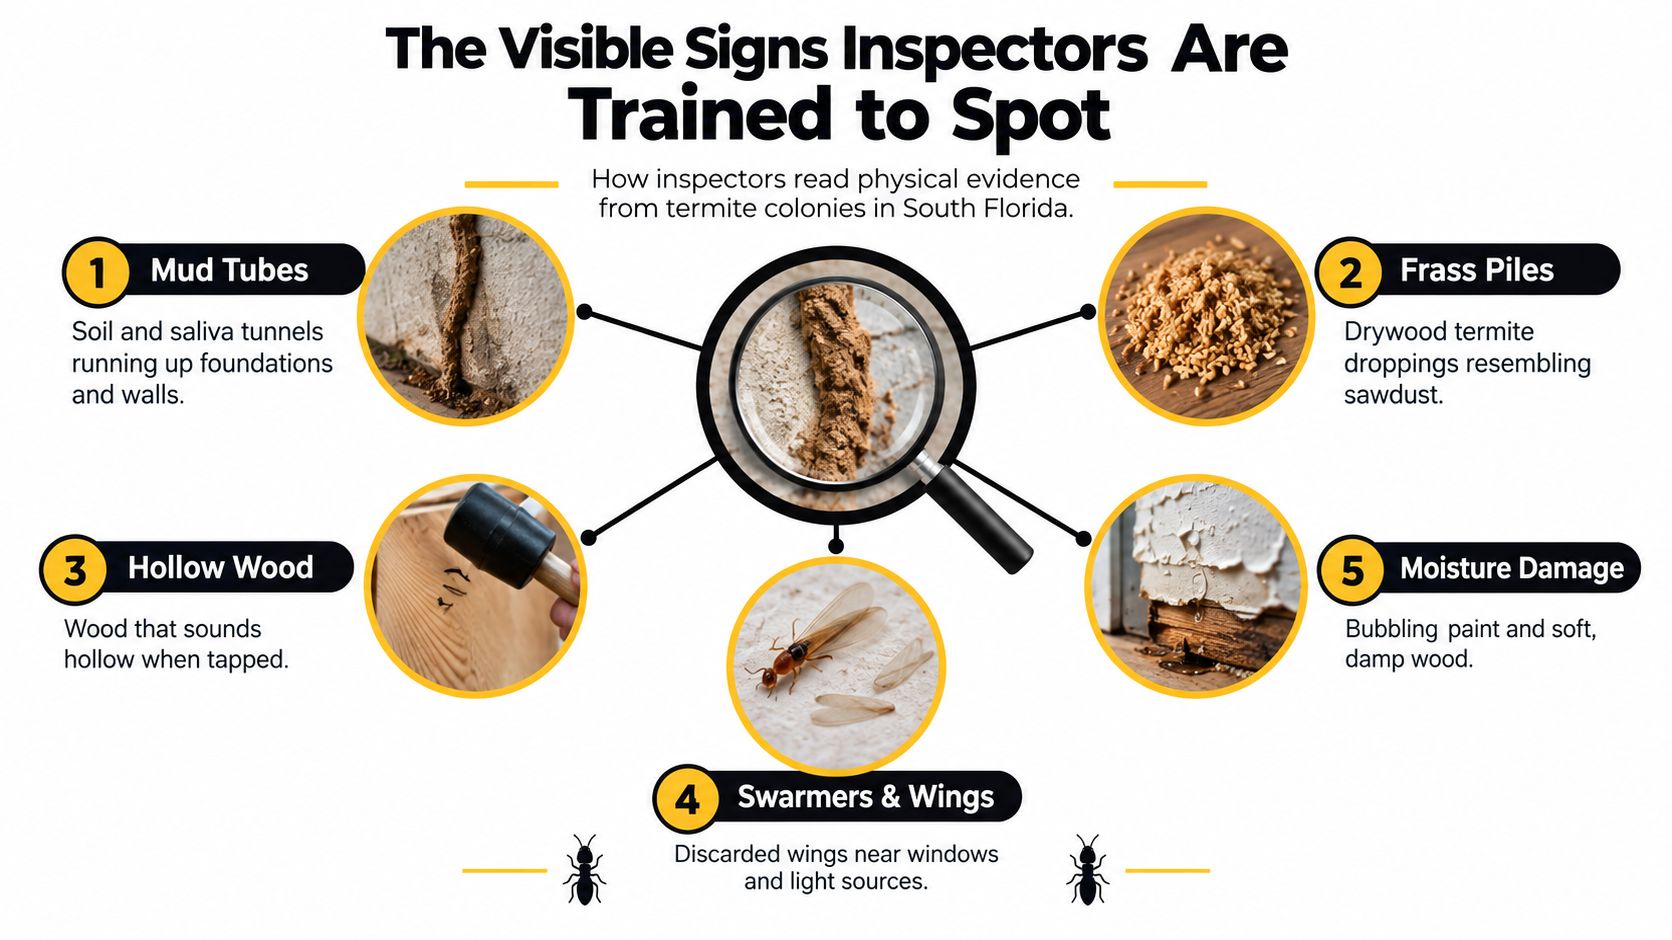
- Mud tubes: These pencil-width shelter tubes are a strong clue for subterranean termites. In Miami-Dade homes, inspectors often pay close attention to slab edges, garage walls, expansion joints, utility penetrations, and spots where soil or mulch sits high against the structure.
- Discarded wings: After a swarm, termites shed their wings near windows, doors, sliders, and light sources. Wings tell the inspector that swarmers were present. They do not prove where the colony is nesting.
- Frass and kick-out holes: Drywood termites leave pellet-like droppings and small openings where they push them out. That matters in Miami because drywood activity is common in trim, door frames, attic framing, and wood soffits.
- Blistered paint, swollen trim, or rippled surfaces: These can signal feeding below the surface, but they can also come from humidity or leaks. South Florida's moisture makes this one easy to misread.
- Soft or hollow-sounding wood: Termites often eat the interior first and leave a thin outer shell. A windowsill, baseboard, or door casing can look normal until it is tested more closely.
A good visual reference helps here. If you want to compare common warning signs before or after the visit, this guide on how to identify termite damage shows the kinds of patterns inspectors often document.
What inspectors can tell, and what they cannot
Homeowners usually want one clear answer: active termites or old damage. Sometimes the answer is clear. Often it is more like reading footprints after rain. Fresh pellets, crisp swarm wings, or intact shelter tubes may suggest recent or current activity. Dry, weathered, or painted-over evidence may point to older damage.
That still has limits.
A visible sign can show that termites were there. It does not always reveal how far the activity extends behind stucco, under flooring, inside block furring strips, or around concealed roof framing. In slab-on-grade Miami homes, a lot of the risk sits at edges, penetrations, and hidden transitions where direct sight is limited.
This is also why Florida WDO reports are careful in their wording. Inspectors document visible evidence, inaccessible areas, and conditions that could lead to infestation. In a sale or purchase, those distinctions can affect repair requests, treatment decisions, and how buyers interpret the findings. The real estate pest denial guide gives useful context on how pest findings can shape a transaction.
A clean paint job can hide damaged wood the same way a fresh patch can hide a crack in stucco. The surface may look fine while the material underneath tells a different story.
That is why inspectors rely on visible signs as evidence to be tested, not as final proof by themselves. As noted earlier, professional inspection guides consistently point to mud tubes, wings, frass, exit holes, and damaged wood as the main warning signs inspectors document during a termite inspection.
Tools and Techniques That Turn a Look Into Evidence
The difference between a casual look and a professional inspection is the toolkit. The inspector isn't just walking around hoping to spot obvious damage. They use simple field methods to test whether what looks suspicious is suspicious.
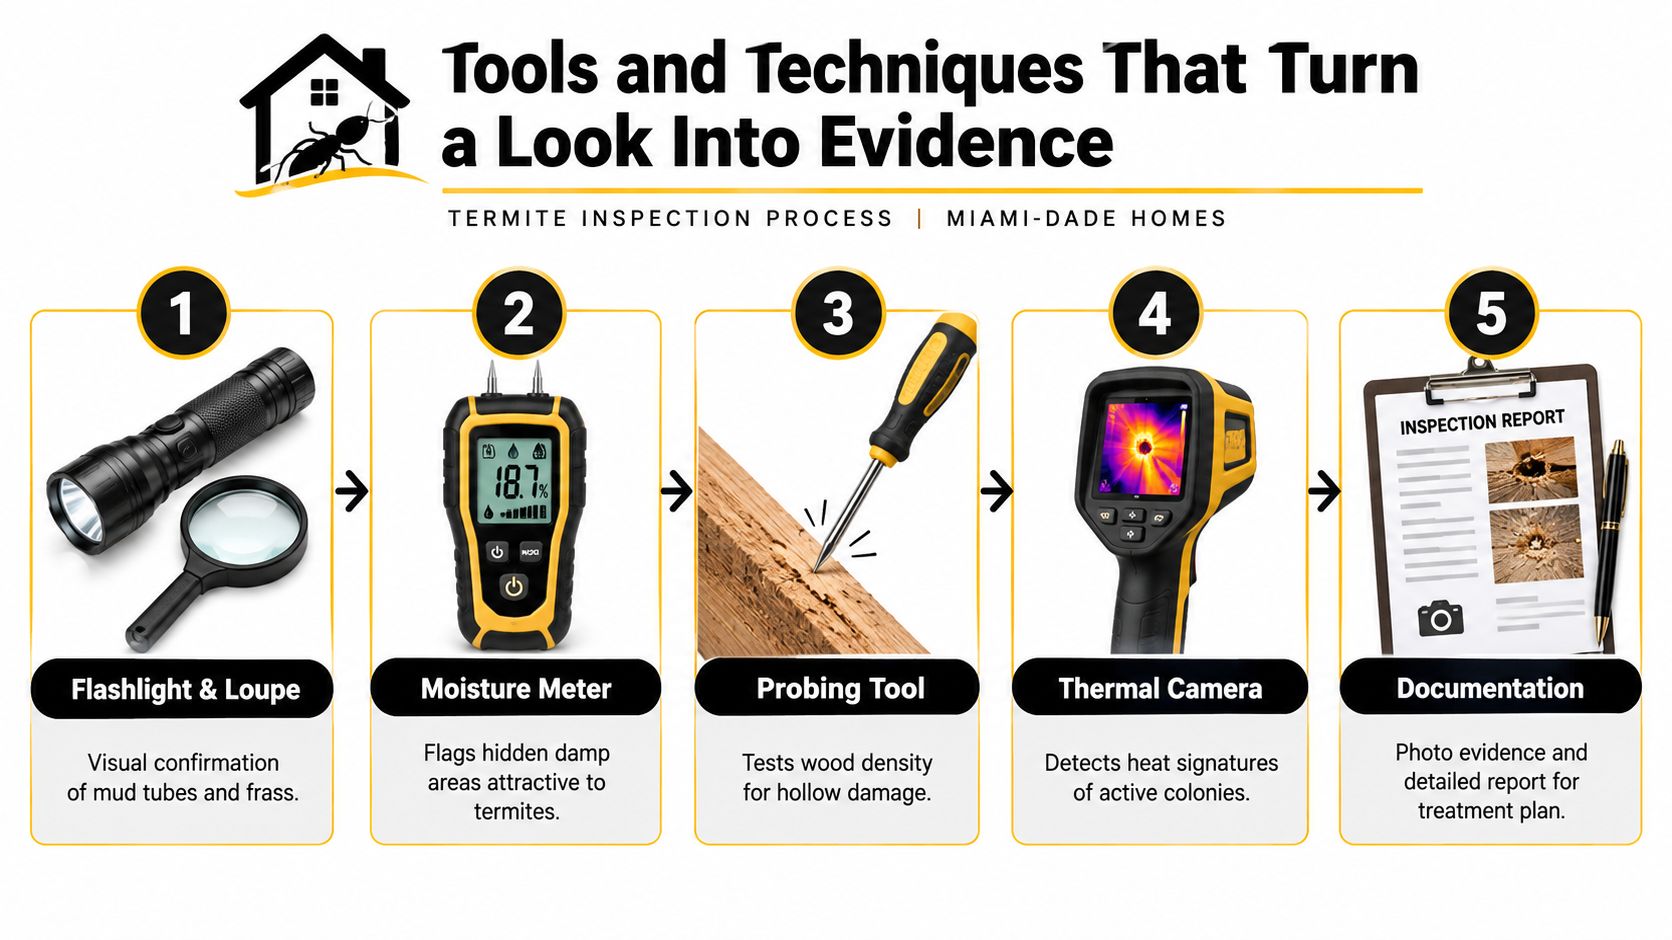
A basic setup often includes a flashlight, magnification, a probing tool such as a screwdriver or awl, and a tapping method for sounding wood. Those old-school tools still matter because termite damage is often structurally deceptive. Termites can leave a thin outer shell intact while hollowing the interior, so wood that looks fine may fail when probed or sounded, as described in this technical overview of termite damage assessment.
Why they spend extra time near moisture
In South Florida, moisture diagnostics are a big part of the inspection. Experienced inspectors commonly use pin or pinless moisture meters in high-risk wood and wall areas because moisture intrusion strongly correlates with subterranean termite activity and conducive conditions. Some also pair moisture readings with thermal imaging or borescope checks when the surface can't be opened.
Bathrooms, kitchens, laundry areas, garage corners, and spots near AC condensate lines often get extra attention for that reason.
A quick visual explanation helps here:
What the tools can't do
These tools improve the inspection, but they don't give X-ray vision. If an area is blocked by built-ins, packed storage, sealed wall cavities, or unsafe attic conditions, the inspector may note it as inaccessible rather than cleared. That's an honest limitation, not a red flag by itself.
Homeowners sometimes hear “no visible evidence” and assume that means “no termites anywhere.” It doesn't. It means the inspector found no visible evidence in the areas they could reasonably assess that day. That distinction is a big part of understanding what to expect during a termite inspection.
How the Written Report and Possible Outcomes Work
The walkthrough ends, but the inspection is not really finished until the findings are put in writing. For a Miami-Dade homeowner, that report is the part you will refer back to later. Buyers show it to lenders. Sellers use it during negotiations. Owners keep it to compare with a reinspection a year from now.
In South Florida, that write-up often follows the WDO style people already know from real estate transactions. The format is meant to answer three practical questions: what was seen, where it was seen, and whether the inspector could fully access the area. In a slab-on-grade home, that location detail matters because termite evidence may be concentrated at a slab edge, a garage expansion joint, a bath trap line, or a wood-to-stucco transition rather than spread evenly through the house.
What the report usually separates out
A clear report sorts observations into different buckets instead of treating the whole house as one yes-or-no answer. That distinction helps because Miami homes often show a mix of old damage, current activity, and risk conditions caused by moisture.
A typical report may describe:
- Active infestation: evidence that supports current termite activity, such as fresh mud tubes, live insects, or new-looking frass
- Previous infestation or old damage: earlier termite evidence that appears inactive at the time of inspection
- Conducive conditions: conditions that make termite problems more likely, such as chronic moisture, wood touching soil, heavy mulch against the wall, or leaks near framing
- Inaccessible areas: spaces the inspector could not reasonably examine, such as blocked attic corners, sealed wall voids, tight crawl spaces, or areas hidden by stored items
That last category is easy to misunderstand. "Inaccessible" does not mean "termite damage found." It also does not mean "all clear." It means the inspector is drawing an honest boundary around what could and could not be checked that day.
A realistic Miami-Dade example
Take a one-story home in Kendall with a concrete slab, a flat or low-slope roof section, and a garage that stays humid in summer.
The inspector notes older, dry damage in a garage header. At the south slab edge, there are mud tubes consistent with active subterranean termite movement. Near a rear downspout, irrigation and rain runoff are keeping the soil wet against the house. One attic corner is blocked by stored materials, so that area is listed as inaccessible.
That report does not point to one simple conclusion. It shows old evidence in one spot, active evidence in another, and site conditions that raise future risk. That is common in Miami-Dade homes, where heat, moisture, and slab construction create very specific trouble spots.
Common WDO report findings and what they mean
| Finding Category | What It Means | Typical Next Step |
|---|---|---|
| No visible evidence of infestation | No visible termite signs were found in the accessible areas inspected | Keep the report, correct any minor risk conditions noted, and follow the recommended reinspection timing |
| Previous infestation or past damage | Older evidence or damage was present, but no clear current activity was observed during the visit | Review repair or treatment history and ask whether monitoring or a follow-up inspection is recommended |
| Active infestation found | The inspector observed evidence consistent with current termite activity | Request treatment recommendations and written estimates soon |
| Conducive conditions present | The home has moisture or construction conditions that increase termite risk, even without confirmed live activity | Fix drainage, leaks, or wood-to-ground contact issues and monitor the area |
If you are comparing quotes after the report arrives, this guide to termite inspection cost can help you understand how inspection pricing and follow-up decisions are usually framed.
If active termites are confirmed, one next step may be to request a quote for Termite Control. The point is straightforward. Stop further structural damage and address the conditions that helped the termites get established.
What matters most in the report: specific location, observed condition, and access limits. "Active tubes at south slab edge" tells you far more than a vague statement that termites were found somewhere outside.
Smart Questions to Ask Before, During, and After the Visit
A termite inspection goes better when you treat it as a conversation, not a sealed-envelope event. Many homeowners stay quiet during the visit because they don't want to interfere. That's understandable, but the right questions can turn a basic inspection into a much more useful decision tool.
Before the appointment
Start with the credentials and the scope.
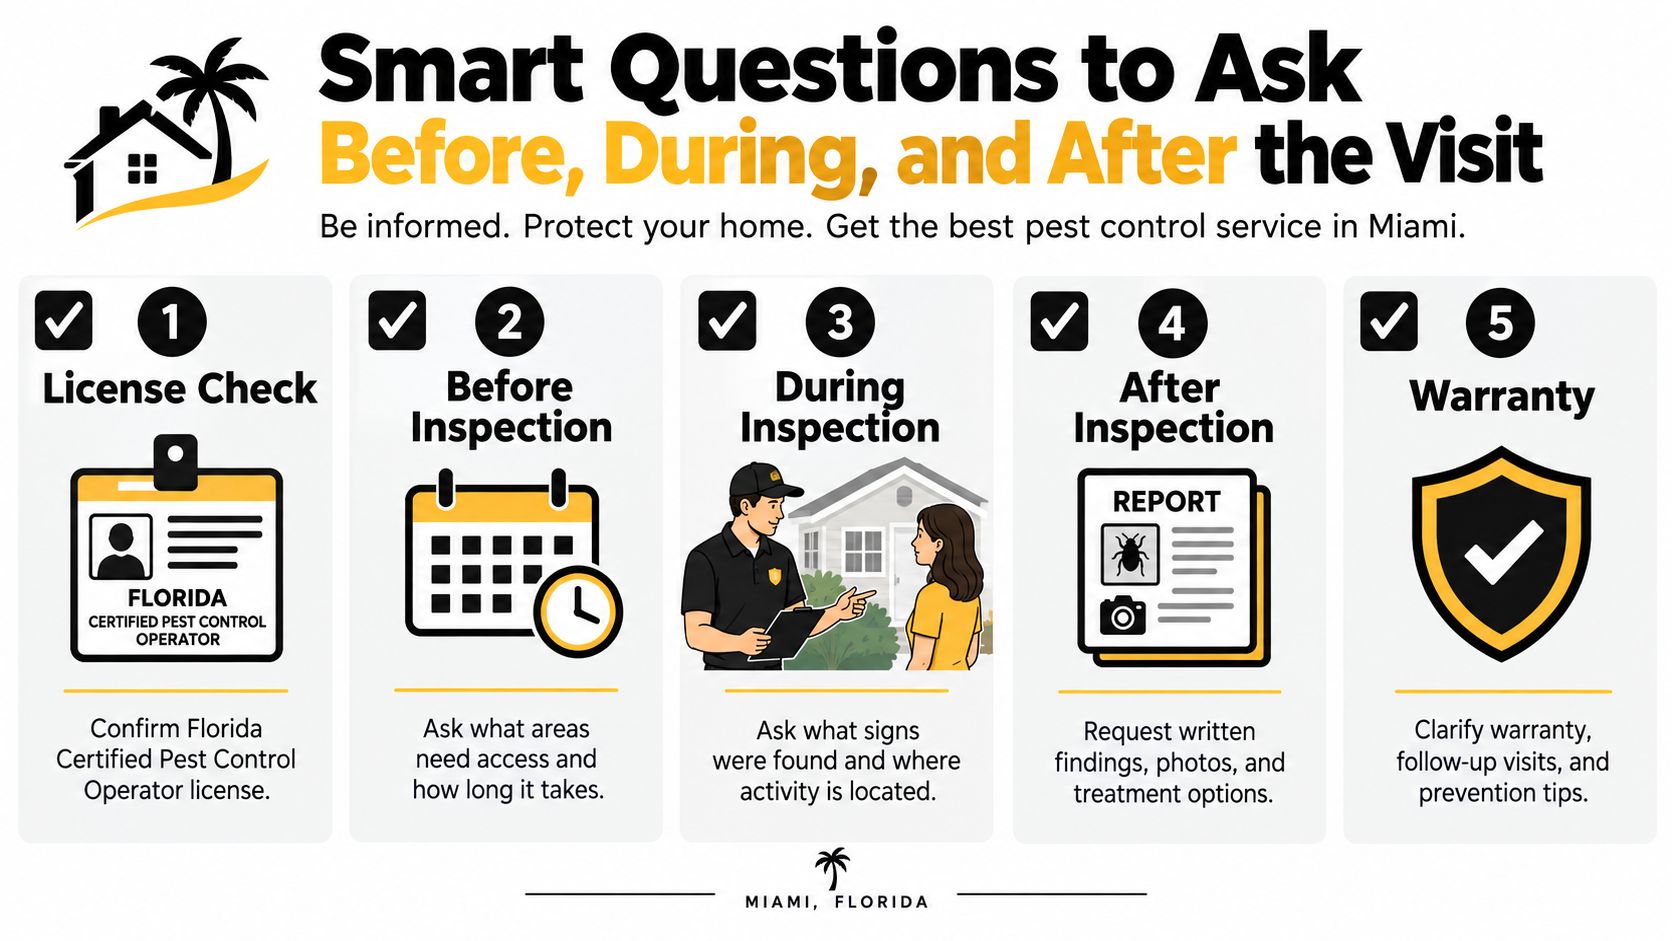
Ask whether the inspector holds the proper Florida licensing for this type of work and whether the company carries insurance. Ask whether the visit is meant to assess both subterranean and drywood termite issues. If this is tied to a pending sale, ask whether the report format will meet the needs of the buyer, seller, or lender involved.
Useful pre-visit questions include:
- Who is coming out: Ask whether the person performing the inspection is the person signing or documenting the report.
- What areas are included: Confirm whether attic spaces, garage interiors, accessible crawl spaces, sheds, and fences are part of the scope.
- How should you prepare: Ask what needs to be moved before arrival so time isn't wasted onsite.
During the walkthrough
Don't wait until the end to hear the important part. If the inspector is comfortable doing so, ask them to narrate key findings as they go.
That can sound like:
- “Can you show me exactly what you're seeing on this wall?”
- “Is this damage active, old, or uncertain from visual inspection alone?”
- “Are you seeing risk conditions here, even if you're not calling this active?”
Ask them to point out conducive conditions, especially in a Miami setting. Irrigation hitting the slab, mulch touching stucco, and recurring dampness around plumbing lines are the sort of details that matter later.
Ask one plain question in every problem area: “What would you do if this were your house?” You're not asking for a sales pitch. You're asking for prioritization.
After the report is in your hands
Once you have written findings, slow down and compare options. If treatment is recommended, ask what kind of follow-up is expected, how reinspection works, and what gets documented after the work is done. If a real estate closing is involved, ask whether treatment must be completed before closing or whether another arrangement is possible under the parties' agreement.
If you're trying to compare providers without making ten calls yourself, Pestless Inc. can be one option to consider. It connects Miami-Dade homeowners with licensed and insured local pest professionals so they can compare quotes and choose a provider that fits the situation.
If the company also handles other household pest issues, you may notice services outside termite work, such as Bed Bug Treatment, which is described as helping eliminate every life stage, bugs, eggs, and all. That's separate from a termite inspection, but it's a reminder to keep scopes clear when you're requesting service.
Miami-Specific Expectations and Your Next Steps
Miami homes give termite inspectors a specific kind of puzzle. The climate stays humid, the construction often sits close to soil on slab-on-grade foundations, and many houses have a long history of repairs, additions, old leaks, or exterior details that create hidden transitions. That doesn't mean every house has termites. It means inspectors here pay close attention to access seams, moisture patterns, and the practical limits of what they can see.
What to expect in a Miami-Dade inspection
A first-time homeowner in another part of the country may picture a basement-heavy inspection. In Miami-Dade, the visit is more likely to focus on the slab edge, garage perimeter, exterior wall bases, plumbing penetrations, attic access, and wet zones around bathrooms and kitchens.
Coastal exposure and year-round humidity also change the look of building materials. Paint bubbles, soft trim, and damp framing don't always point to one cause. The inspector has to sort out where moisture stops and where insect evidence begins.
That's why a clean-looking wall doesn't settle the question. Access and context matter.
A simple before and after checklist
Use this short list to stay organized.
Before the inspection
- Create access: Open gates, move cars, and clear garage and closet edges along exterior walls.
- Prepare upper spaces: Make sure the attic pull-down ladder works if your house has one.
- Gather records: Keep prior WDO paperwork, treatment notes, and leak history in one place.
- Flag moisture issues: Point out irrigation runoff, AC condensate drips, plumbing leaks, or places that stay damp.
- Secure animals: Keep pets contained so the inspector can move efficiently.
After the inspection
- Read the findings: Focus on where activity, past damage, or conducive conditions were documented.
- Ask about inaccessible areas: If a zone couldn't be inspected, decide whether better access is worth creating for a follow-up.
- Compare treatment recommendations: Don't rely on a verbal summary alone. Get written options.
- Correct moisture sources quickly: Even when no active termites are found, moisture problems deserve attention.
- Plan the next inspection: In South Florida, a good report isn't a lifetime pass.
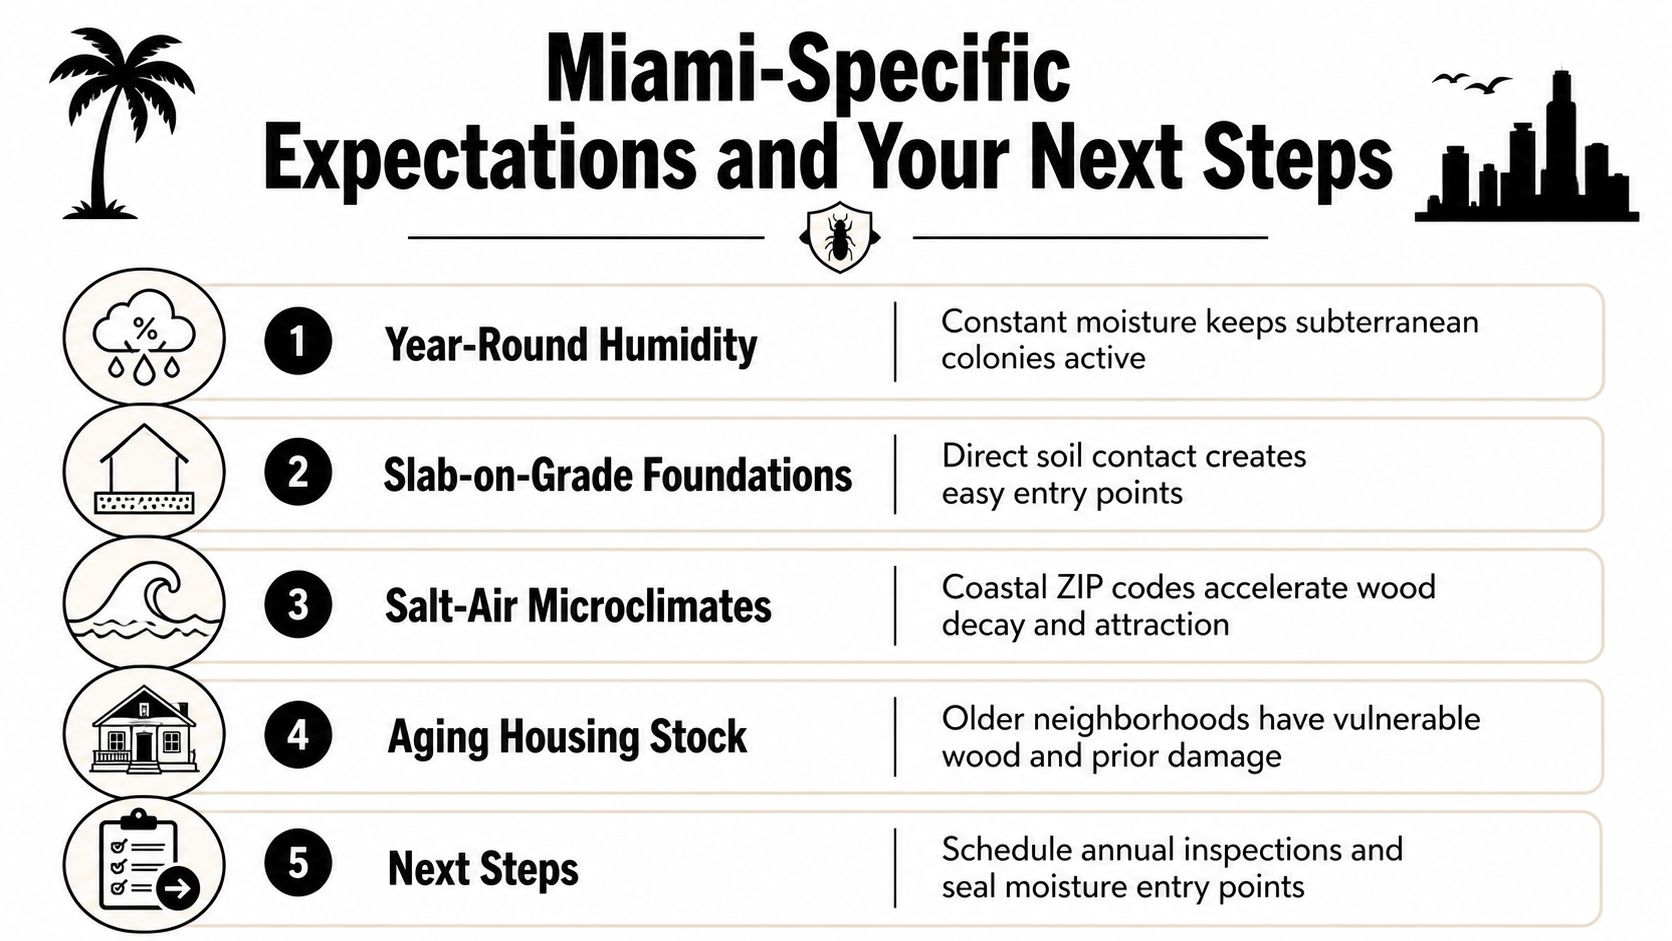
A termite inspection gives you a snapshot, not permanent immunity. In Miami, conditions change fast. A new leak, a landscaping change, blocked drainage, or a neglected exterior wall can alter the risk profile of the same house without much warning.
If you wanted a plain answer to what to expect during a termite inspection, here it is: expect a structured search for evidence, a realistic discussion of what was visible and what wasn't, and a written record that helps you decide what to fix, treat, monitor, or revisit.
If you need help finding a licensed, insured local pro for an inspection or follow-up treatment, Pestless Inc. helps Miami-Dade homeowners compare options without a hard-sell process. You can use Pestless Inc. to connect with local providers for termite-related concerns and get clearer next steps based on your home, your neighborhood, and your report.
Dealing with this pest right now?
Pestless connects you with a licensed, insured Miami pest control provider for a free, no-obligation quote.