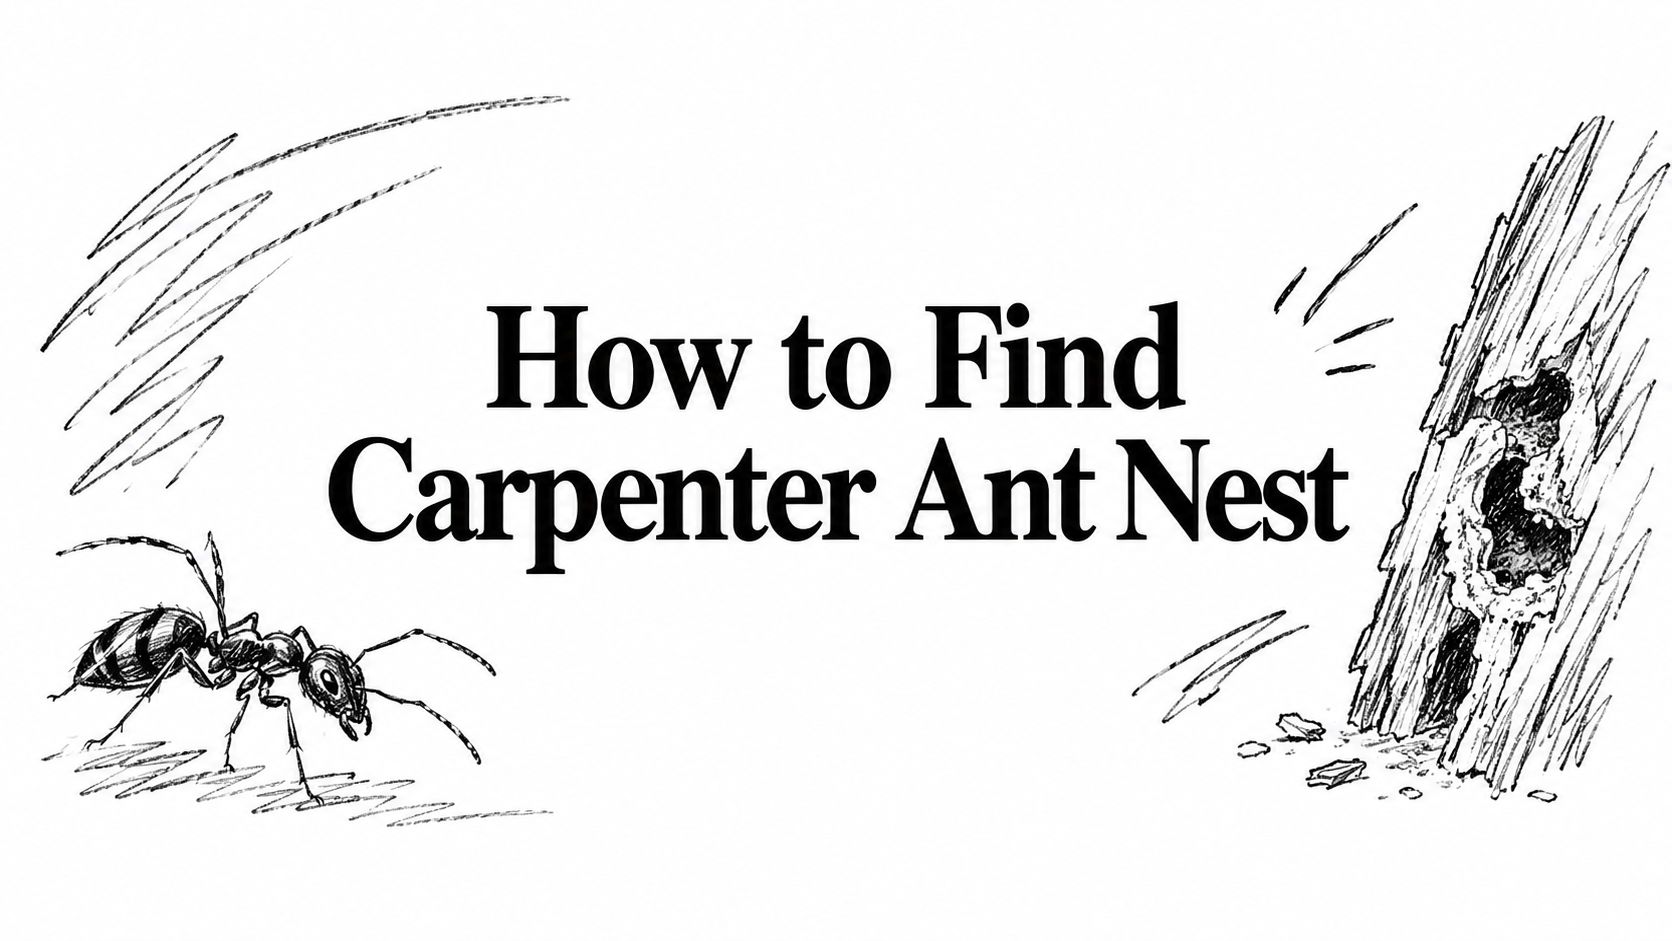
You wipe up a little pile of wood shavings beneath the bathroom window, then notice large ants crossing the tile after dinner. In a Miami home, that's enough to raise an uncomfortable question: are they nesting behind the wall, or just coming inside from the yard? Before you reach for spray or start pulling off trim, preserve the evidence. Finding a carpenter ant nest starts with matching moisture, debris, and nighttime traffic, not guessing where to open the house.
Table of Contents
- Why Finding the Nest Matters More Than Killing the Ants
- Map Moisture and Wood Condition Before You Search
- Read the Physical Evidence at the Scene
- Run a Nighttime Trail Tracking Protocol
- Triage Indoor Versus Outdoor Colonies
- Safe DIY Steps Once a Nest Is Suspected
- When to Call a Licensed Miami Pest Pro
Why Finding the Nest Matters More Than Killing the Ants
Consider a bathroom in Kendall with ants near the vanity and coarse debris below the baseboard. It's tempting to treat that baseboard as the source. But the visible opening could be a travel route, a place where ants discard excavated material, or an access point leading somewhere else.
Those possibilities call for different responses. Spraying the ants you can see doesn't establish which explanation is right.
Treat the sighting as an inspection lead
Carpenter ants excavate wood for nesting rather than eating it. That makes the condition of the material important: the search isn't about finding insects, but understanding what accessible wood or concealed space they're using.
The distinction between an outdoor parent nest and an indoor satellite nest matters just as much. You might locate activity inside the building without locating every nest associated with it. Conversely, workers crossing a bathroom floor don't automatically prove that they've established themselves behind the tub.
A useful inspection should answer practical questions:
- Where does activity concentrate? Record the room, surface, and opening rather than describing ants as being everywhere.
- What evidence accompanies it? Separate a passing worker from a repeated trail, debris deposit, or visible emergence.
- What remains unconfirmed? Label a suspected void as suspected until you have supporting evidence.
Practical rule: A disappearance point is a place to investigate, not permission to cut into the wall.
Preserve the route before intervening
The trade-off is straightforward. Killing visible workers offers immediate relief, while watching them can provide information you'll need for targeted control. During the inspection, resist the urge to spray every crack or scrub away every active route before documenting it.
Photograph the opening, note the direction of travel, and mark it on a simple sketch. Keep food preparation areas clean, but separate that housekeeping from the deliberate observation of a suspected route.
When you're learning how to find a carpenter ant nest, a confirmed location is more useful than a temporarily empty countertop. Successful searching narrows the treatment area and identifies building conditions that also need attention.
Map Moisture and Wood Condition Before You Search
Start with the house, not the ants. University of Minnesota Extension's carpenter ant guidance associates indoor nests with moist or decayed wood affected by leaks, condensation, or poor air circulation, while parent colonies commonly occupy decaying material outdoors.
That gives you a sensible inspection order: identify moisture, examine adjacent wood and voids, then look for confirming activity. Don't begin by opening a wall just because an ant walked across it.
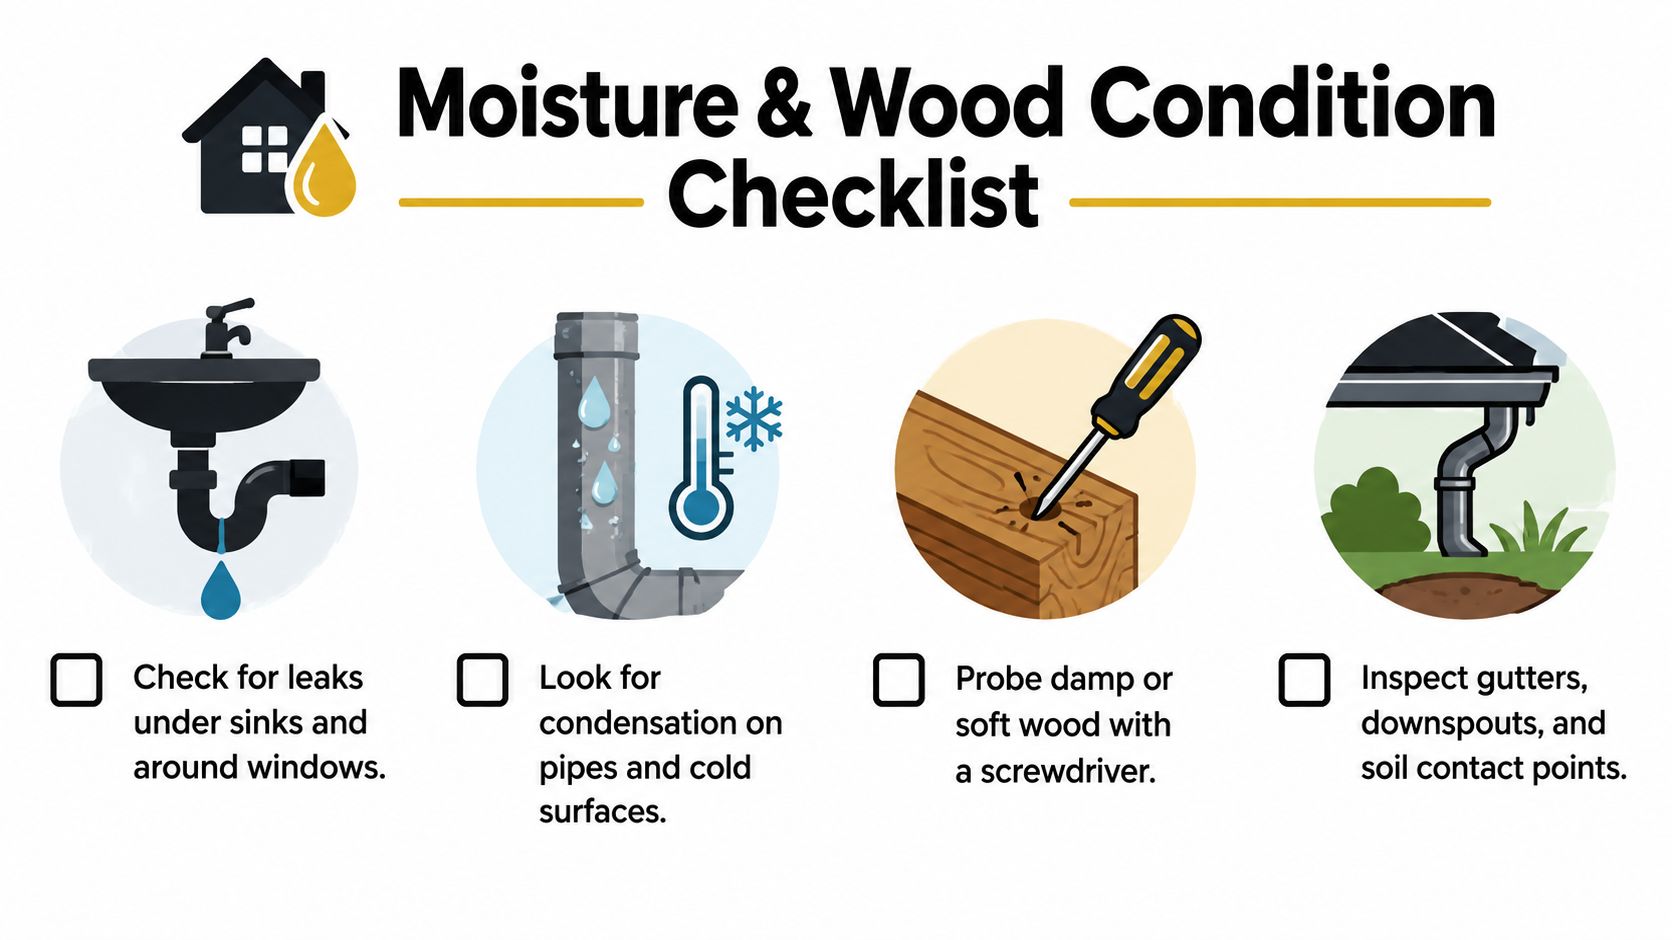
Use this checklist to organize the initial walk-through.
Build a room-by-room moisture map
Carry a flashlight, phone, and notepad. Record both the condition you observe and its location, such as staining beneath the kitchen sink or softened trim beside the shower.
- Bathroom and kitchen plumbing: Check accessible areas around tubs, showers, dishwashers, supply lines, and drain penetrations.
- Roof-related areas: Note ceiling stains, known roof leaks, and accessible attic wood. Keep roof and high exterior inspections for qualified professionals.
- Openings and concealed spaces: Include doors, window casings, curtain-rod attachments, and accessible wall or subfloor areas.
- Exterior wood: Mark tree cavities, stumps, stored boards, planter timbers, porch supports, and wood touching soil.
In Miami-Dade, include locations affected by stormwater intrusion and persistent condensation. A dry surface during your visit doesn't settle whether the area has been repeatedly wet, so add known leak history to the map.
If you can see damage but can't identify the water source, AMPM Restoration Services' DIY leak detection for Florida homes is a relevant resource to consult before assuming the ant problem is isolated from a plumbing or envelope problem.
Assess accessible wood without creating damage
Inspect exposed surfaces for visible deterioration and compare suspicious areas with nearby intact material. If you use a screwdriver to check already exposed, nonstructural wood, apply light pressure only. Don't punch through finishes, pry off trim, or probe concealed cavities.
Soft wood isn't proof of ants. Log it as a moisture or deterioration finding, then look for insect evidence separately. Photograph each location with enough surrounding detail that you can find it again after dark.
Read the Physical Evidence at the Scene
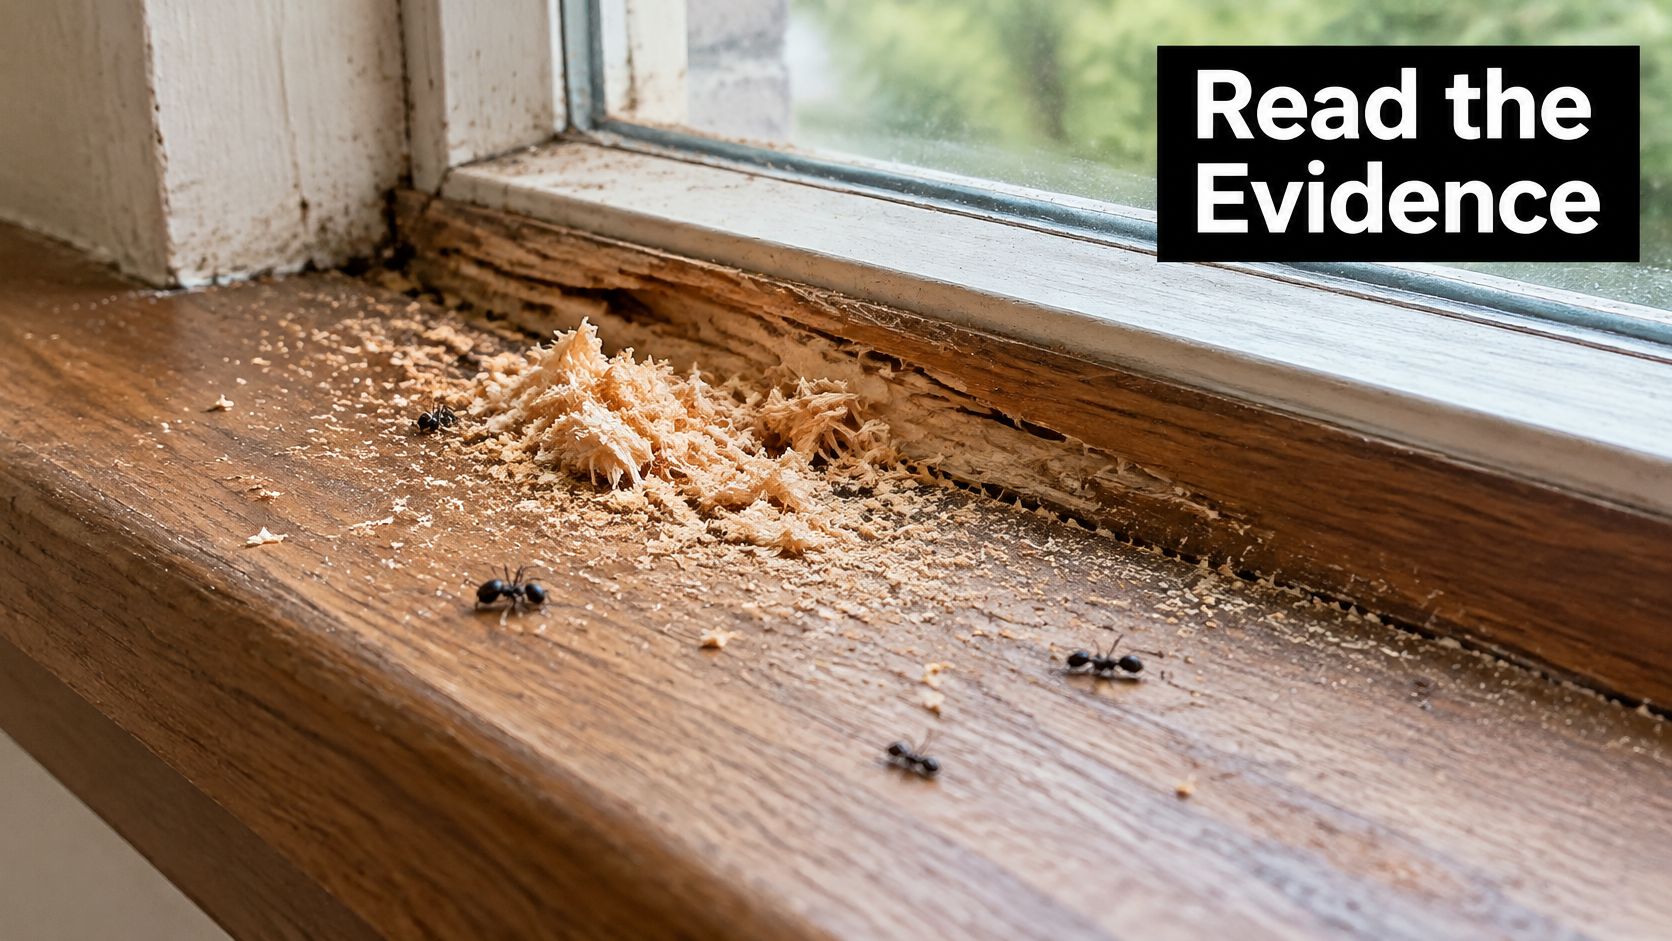
Debris can narrow a search considerably, but only if you inspect where it came from. A pile on the sill may sit below an opening above it, rather than directly beside the nest.
The Minnesota guidance noted earlier describes coarse, pencil-shaving-like frass beneath cracks, trim, sills, and other openings. Ants expel this material while excavating galleries, making the deposit a useful location clue rather than a complete diagnosis.
Look at the debris and the surrounding opening together.
Separate a clue from confirmation
Photograph the undisturbed deposit, including the trim or crack above it. Save a sample if identification is uncertain, and note whether anyone recently drilled, sanded, or repaired that area. Don't identify carpenter ants, termites, or ordinary construction debris from a pile alone.
Use the evidence according to what it establishes:
| Evidence | What to investigate |
|---|---|
| Coarse shavings beneath an opening | The wood and void above or beside the deposit |
| Workers repeatedly using the same crack | The route beyond the visible access point |
| Exposed galleries | Their shape and surface condition, without enlarging the opening |
| Winged ants emerging from building materials | The precise emergence location and possible concealed nesting |
Confirmed carpenter ant galleries are typically broad, irregular, smooth, and clear of loose debris. Only assess galleries already visible through an existing opening or exposed damaged material. Don't manufacture access to look for them.
Give repeated evidence more weight
Minnesota Extension identifies approximately 20 or more workers indoors as a reason for focused nest investigation. Treat that as a field clue, not a requirement to count every ant or a guarantee that the nest is indoors.
Winged ants deserve careful documentation, particularly when you see them coming out of a building opening rather than merely resting near a window. The guide to recognizing a carpenter ant with wings can help you prepare identification questions.
Save the specimen and photograph the emergence point. A description of flying ants near the bathroom is less useful than evidence of exactly where they appeared.
Run a Nighttime Trail Tracking Protocol
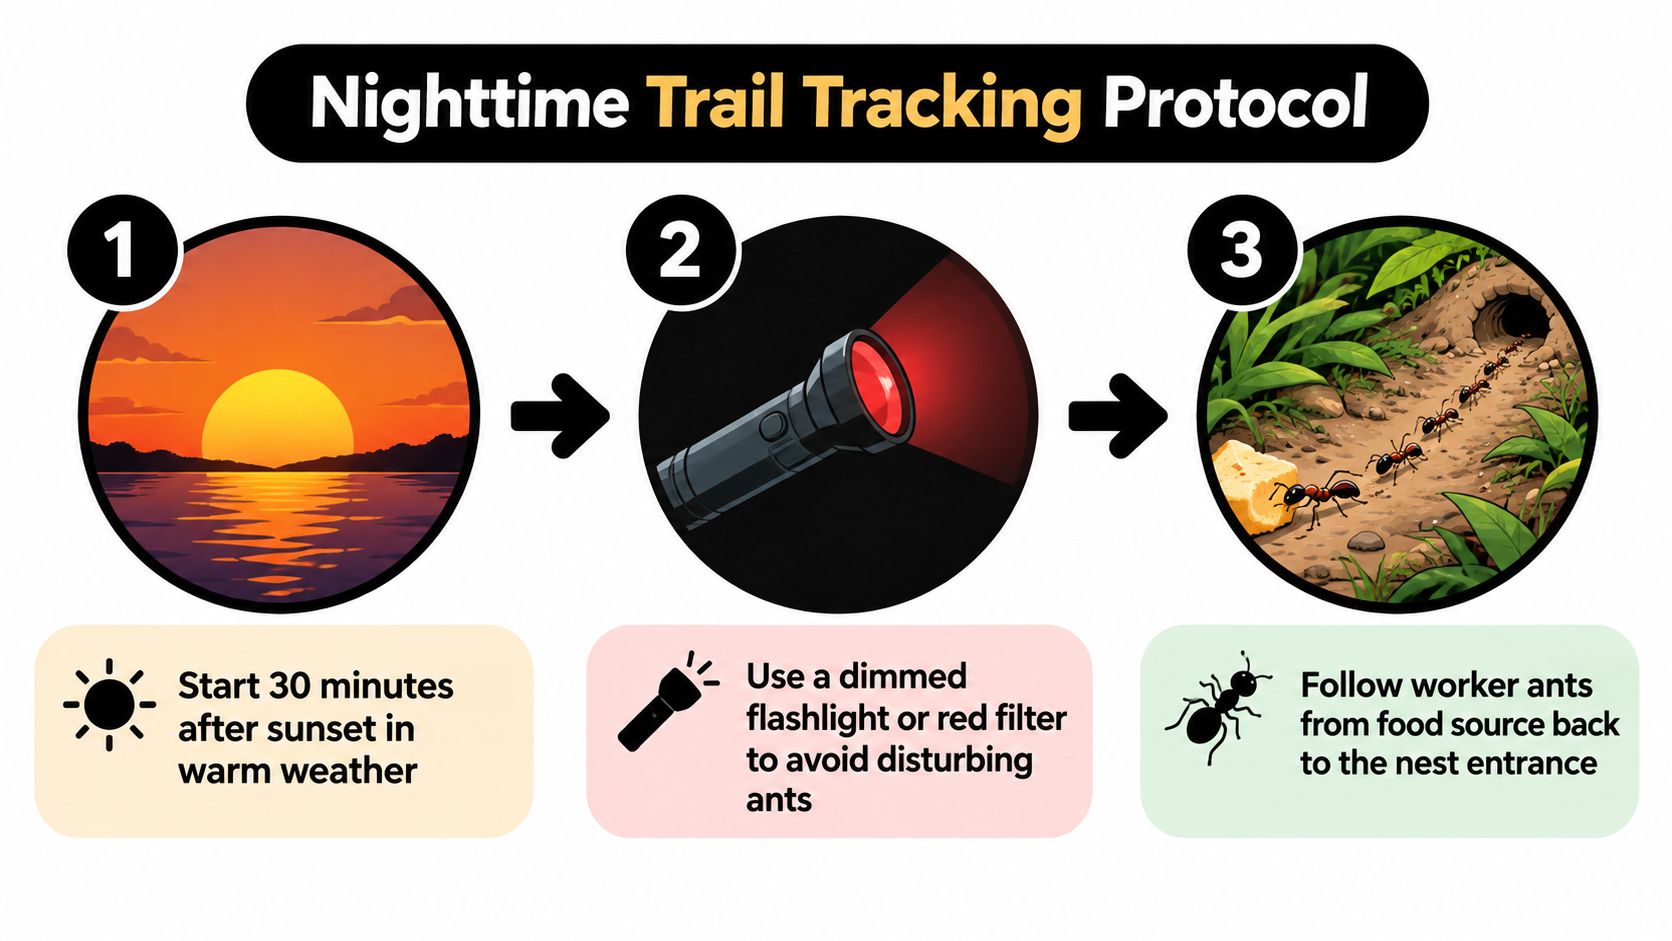
Daytime searching can leave you staring at inactive cracks. For carpenter ants, use their normal foraging schedule instead: University of Georgia Extension recommends beginning about 30 minutes after sunset, ideally during warm-season activity, with a dimmed flashlight or red filter.
Prepare your route while there's still daylight so you aren't navigating unfamiliar landscaping or clutter in the dark. Keep the inspection at safely accessible ground and floor level.
This visual summarizes the tracking sequence.
Map the traffic before placing food
Begin at the locations you recorded earlier. Watch carefully for several minutes, keeping the light low enough to follow workers without continually interrupting them.
- Trace the entire visible route: Look along baseboards, carpet edges, siding, window trim, and plumbing penetrations.
- Mark transitions: Record where workers move from floor to trim, disappear behind an appliance, or enter an exterior gap.
- Keep routes separate: Don't assume ants in different rooms are using the same concealed pathway.
Place a small amount of diluted honey, sugar water, or a dead soft-bodied insect beside an active trail as a temporary monitoring lure, following the Georgia protocol. Recheck after one to two hours, as that guidance recommends, and follow workers returning with food. Don't add pesticide to the monitoring food, and keep it away from children and pets.
Check the corresponding exterior location
A wall entry isn't a precise nest address. Georgia Extension cautions that the colony may be several feet away from where workers disappear, so inspect the corresponding outside location and continue tracing accessible routes.
Compare your observations with nearby soffits, door frames, decks, porch columns, and plumbing penetrations. Mark roof, chimney-flashing, or skylight leads for professional inspection rather than climbing to follow them.
For a visual companion to your written observations, use the video below.
Remove temporary food when you finish and preserve your notes. The useful principle behind Ant Control is to treat the colony, not just the trail. Tracking supplies the location evidence needed to make that distinction.
Triage Indoor Versus Outdoor Colonies
A kitchen trail establishes that ants have access to the kitchen. It doesn't establish where they nest. Compare the complete route with the moisture map and physical evidence before deciding that the wall contains a satellite colony.
University of Florida Extension's Florida carpenter ant guidance identifies potential nest locations including support pillars, window frames, attics, dead branches, rotting stumps, and palm structures. Its emphasis on nighttime trailing fits a Miami inspection well: examine the building and nearby grounds as connected search areas.
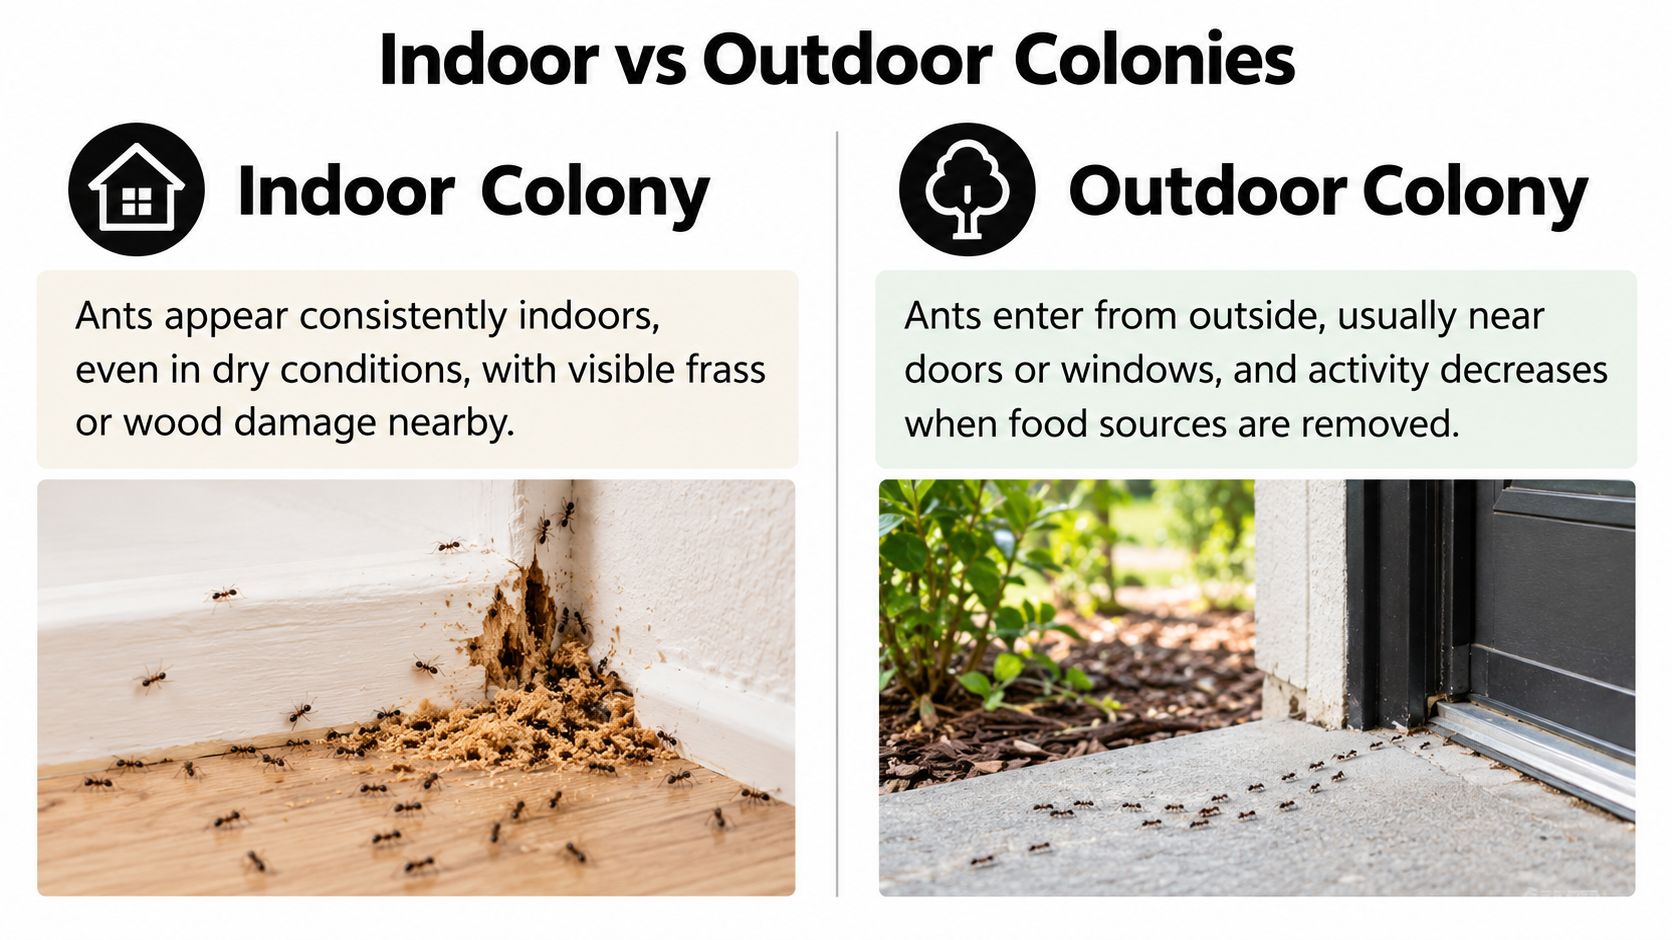
Use the comparison below as a starting point, not a stand-alone identification test.
Compare evidence rather than choosing too early
Colorado State University Extension distinguishes seasonal indoor activity from year-round worker activity. Activity confined to a season often points toward an outdoor nest, whereas year-round wingless workers are more suggestive of a building-associated nest.
Those are indicators, not verdicts. Give more weight to several observations that agree than to a single sighting.
- Outdoor origin is more plausible: You can follow workers between the building and a specific tree cavity, stump, timber, or other nearby setting.
- Indoor nesting deserves closer investigation: Repeated void traffic coincides with localized frass, damp material, or documented emergence.
- The location remains unresolved: Ants vanish into an inaccessible space and you can't establish their route beyond it.
Apply the comparison to Miami construction
For a flat-roof home, compare ceiling activity with known storm-related leaks and accessible roof-edge observations. Around palms and dense planting, inspect visible routes without cutting into trunks or dismantling plantings.
In a condo, document activity at utility penetrations and shared-wall locations, then involve building management before anyone opens common construction. An inaccessible attic should remain an unresolved inspection area, not an assumed nest location.
Dry conditions during one visit don't rule out concealed nesting, and reduced kitchen traffic after cleaning doesn't prove an outdoor colony. Keep the diagnosis provisional until the route and supporting evidence agree.
Safe DIY Steps Once a Nest Is Suspected
Once you've narrowed the search, the safest homeowner work is usually documentation, moisture correction, and accessible maintenance. Suspecting a nest doesn't make a wall safe to drill or a void appropriate to treat.
Keep a small inspection kit together: flashlight, phone, notepad, gloves, and a labeled container for a specimen or debris sample. A screwdriver belongs in that kit only for cautious checks of exposed material, not exploratory demolition.
Work on conditions you can safely reach
Use your findings to prepare a focused maintenance list:
- Repair accessible leaks: Stop a clearly identified water source or arrange the appropriate plumbing or roofing repair.
- Address ventilation concerns: Have persistent condensation or poor air circulation assessed rather than covering the affected surface.
- Plan deteriorated-wood repairs: Document the area before removal and involve a contractor if its structural role is uncertain.
- Manage exterior contact points: Trim accessible vegetation away from the building and plan relocation of stored wood without disturbing a suspected nest prematurely.
- Coordinate sealing: Photograph and understand active entry routes before closing them, then align sealing with the treatment plan.
These are supporting measures, not proof that a colony has been eliminated. A sustainable pest management approach keeps inspection, building maintenance, and targeted treatment connected rather than treating them as interchangeable tasks.
Set a firm limit on treatment access
Don't broadcast-spray suspected areas merely because you haven't found the nest. That replaces a location question with a chemical application without resolving the diagnosis.
If you're considering a borate-based wood treatment, don't assume any product is suitable for an ant-occupied void. Read the label for the target pest, permitted material, application method, and protective requirements. Ask the licensed professional whether it belongs in the plan; don't use it as a substitute for locating the colony.
Stop-work boundary: Leave concealed electrical areas, structural framing, and any work requiring opened walls or roofs to qualified professionals.
Avoid destructive probing, blind drilling, and pouring liquids into cracks. You can provide useful inspection evidence without exposing wiring, damaging finishes, or making assumptions about what lies behind them.
When to Call a Licensed Miami Pest Pro
Call a professional when fresh debris persists, winged ants repeatedly emerge indoors, or several suspected sites remain unresolved. Inaccessible voids, questionable framing, and moisture repairs requiring opened walls or roofs are also sensible stopping points for DIY investigation.
Bring your photographs, moisture map, activity notes, and any saved specimen. Tell the provider what you observed directly and what you only suspect.
Ask for a diagnosis and a defined scope
Before authorizing work, confirm the provider's Florida license and active insurance. Ask how they'll distinguish exterior foraging from structural nesting, what areas they can inspect without damage, and what would justify additional access.
- Inspection charges: Ask whether inspection and treatment quotes are separate, and what a return visit would involve.
- Treatment scope: Request a description of confirmed findings, unresolved areas, and proposed follow-up.
- Repair coordination: Clarify who handles leaks, deteriorated wood, and access restoration.
The guide to choosing an ant control service near you can help organize those questions. A useful proposal should address the colony location and the building conditions, not just promise fewer visible ants.
For help finding a provider, Pestless Inc. connects Miami and Miami-Dade homeowners with licensed, insured local pest professionals rather than performing treatments itself. Share your suspected nest locations and inspection notes to request a no-obligation quote and discuss a targeted carpenter-ant inspection.
Dealing with this pest right now?
Pestless connects you with a licensed, insured Miami pest control provider for a free, no-obligation quote.