You're in bed in Miami, the house is quiet, and something is moving above the ceiling. It's quick, light scurrying rather than the heavier thump of a raccoon. By morning, you may find dark droppings near the insulation, a shredded patch of fiberglass, or a faint musty odor that gets stronger when the air conditioner runs.
The practical answer to how to get mice out of attic spaces isn't a handful of traps tossed near the access hatch. It's an inspection, a controlled removal, a cleanup, and a repair to the building envelope. The U.S. Census Bureau reported that nearly 14.8 million occupied U.S. housing units saw rodents during the previous 12 months, out of about 124 million occupied housing units overall, while the National Wildlife Control Operators Association notes that some researchers estimate mice nest in attics in as many as 95% of homes nationwide. The NWCOA attic-mice overview puts the problem in useful context.
A quiet attic for a week doesn't prove the job worked. The test is whether activity stops, entry points are closed with materials mice can't defeat, and monitoring stays negative after the traps come out.
Table of Contents
- What You're Actually Dealing With in the Attic
- Reading the Signs Before You Buy Any Equipment
- Choosing the Right Trap or Bait Setup
- The Sequence Question, Trap First or Seal First
- Sealing Entry Points the Mice Are Using
- Cleaning Up Droppings and Contaminated Insulation Safely
- Keeping Mice Out for Good and Knowing When to Call a Pro
What You're Actually Dealing With in the Attic
A mouse in the attic is evidence of a house problem, not just an animal problem. Somewhere along the roofline, soffit, vent, flashing, or utility penetration, the exterior shell has left an opening. Trapping the mice without correcting that opening only creates an empty apartment for the next mouse.
House mice are the usual occupants in suburban attics, with deer mice appearing in some homes as well. That distinction matters during cleanup because deer-mouse activity raises additional hantavirus concerns, and dried droppings or nesting material can become airborne when disturbed. If you notice a persistent attic odor, visible mold, or moisture damage alongside the rodent signs, an attic mold inspection in Marion County can help separate moisture-related damage from contamination linked to the infestation.
Why the attic works so well for mice
Attics offer the combination a mouse wants: stable shelter, darkness, protected travel routes, and nesting material. Fiberglass insulation can be pulled into a soft nest, while trusses, wiring chases, and wall intersections provide concealed runways. Sweating ductwork or a small plumbing leak may also provide moisture.
In South Florida, the attic may not be cold, but it still offers protection from rain, predators, household activity, and temperature swings. Roofline gaps, damaged vent screens, and loose soffits give mice access without requiring them to cross open floors inside the home. Once established, they can travel through wall cavities and around ceiling penetrations.
Practical rule: Treat scratching above a bedroom as a clue about the structure. The sound tells you where the animal is moving, not necessarily where it entered.
The broader inspection should include the attic and the exterior, not just the space where you found droppings. A useful primer on animals using roof and wall voids is this guide to an animal in the attic, but the removal decision still depends on the evidence in your house.
Think of the job in three phases. First, determine where the mice travel and how they got in. Second, remove the animals already inside without driving them into finished rooms. Third, close the routes and establish a monitoring routine. That detective work is what separates a lasting exclusion from a temporary reduction in noise.
Reading the Signs Before You Buy Any Equipment
Start with a flashlight, gloves, a notebook, and a camera. Don't buy traps until you know whether the activity is concentrated around one roofline transition or spread through the attic perimeter.
Follow the evidence
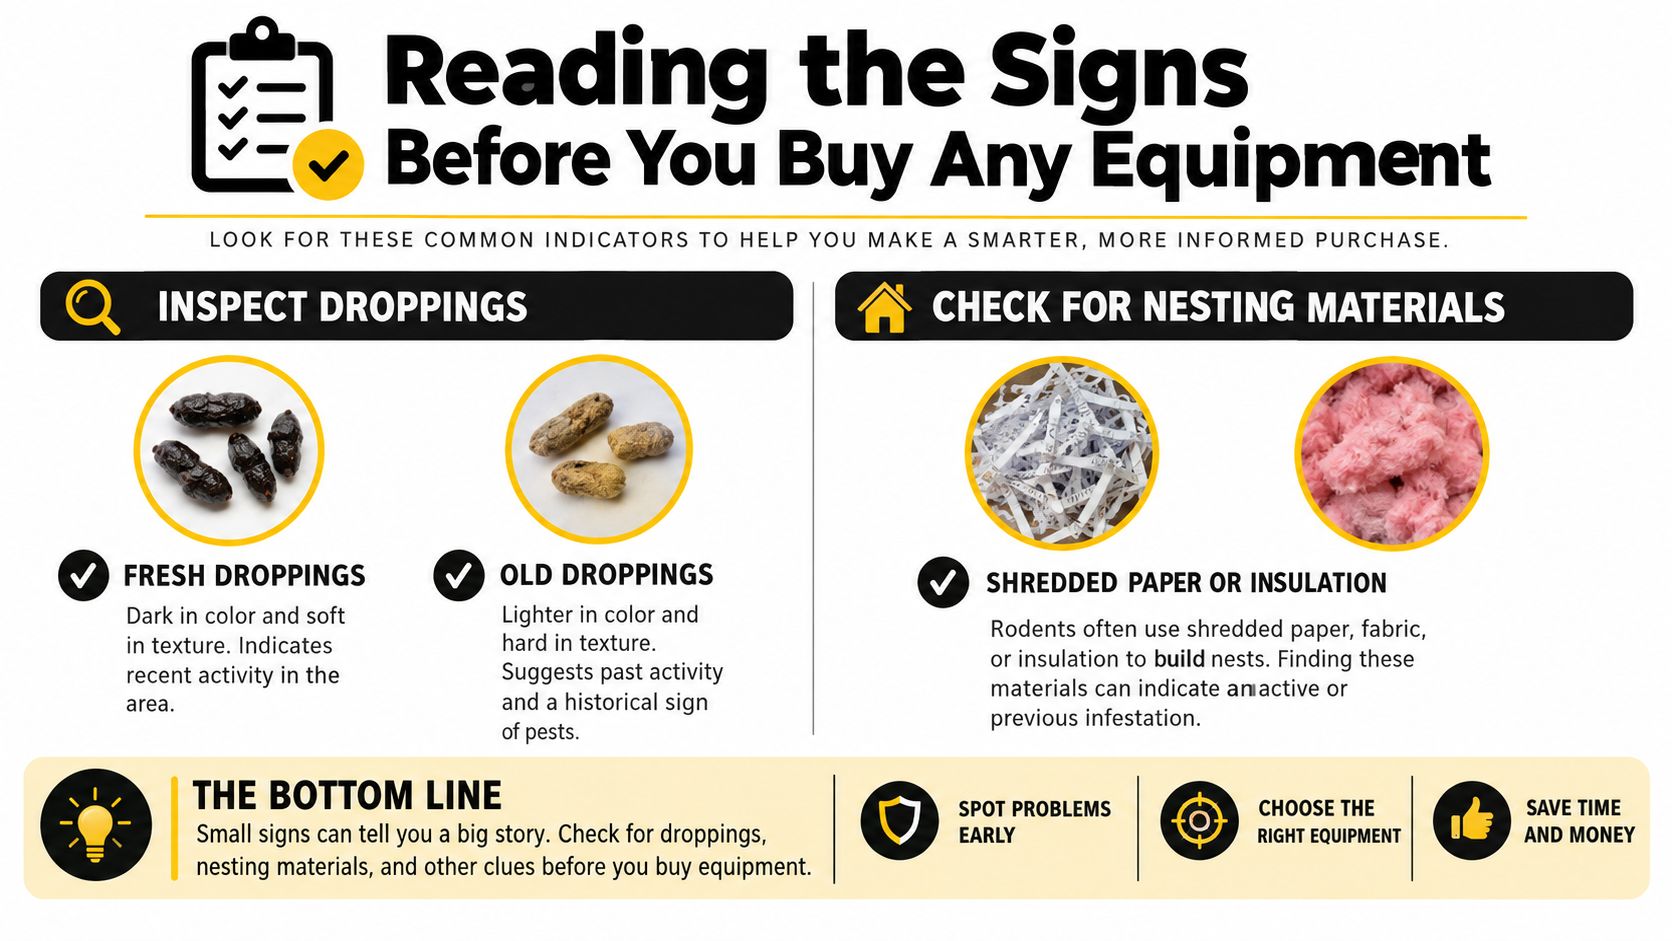
Begin with droppings. Fresh droppings tend to look dark and soft, while older material becomes harder and may crumble. Location matters as much as appearance. Concentrations along truss faces, wall plates, duct runs, or the edge of insulation reveal the routes mice use repeatedly.
Next, look for rub marks. Mice transfer oils and dirt from their fur to surfaces they travel beside, leaving smudges on framing, pipes, and sill-like edges. A dark line along a truss is more useful than a random dropping in the middle of the attic because it helps you place traps across an active runway.
Use the flashlight low and parallel to the surface rather than pointing it straight down. That angle makes tracks, debris, droppings, and disturbed insulation cast small shadows. Photograph each active area before moving insulation, then sketch the route on a simple attic plan.
Decide whether the problem is localized
Look for nesting material made from shredded paper, fabric, or insulation. A nest tucked under insulation suggests sustained use, while a few isolated droppings near a vent may indicate a smaller intrusion. Don't assume the visible nest is the only one. Check corners, soffit transitions, roof penetrations, and the areas above HVAC equipment.
Gnawing also helps identify the scope. Inspect wiring jackets, PVC, wood edges, and stored materials for paired tooth marks and freshly exposed material. The pattern and size can help distinguish mouse work from damage caused by larger rodents or squirrels, but chewed electrical wiring deserves an electrician's attention regardless of the animal.
The smell provides another clue. A sharp ammonia-like odor near insulation or an HVAC return usually points to accumulated urine, not a single visitor. If the odor is strongest near a return-air leak or duct boot, mark that location before disturbing anything.
For a homeowner, the inspection should answer three questions:
- Where are the runs? Mark at least two routes, preferably on opposite sides of the suspected activity.
- Where is the access? Look from inside for daylight, damaged mesh, loose flashing, or gaps around pipes and cables.
- How extensive is the nesting? Record every nest, contaminated patch, and damaged wire before buying equipment.
A useful guide to what attracts mice can help you identify food and shelter sources, but attic signs should drive the setup. Equipment chosen before inspection often ends up in the wrong place.
Choosing the Right Trap or Bait Setup
The right setup depends on access, mouse activity, and how safely you can check the equipment. For most Miami attics, the practical options are snap traps, multi-catch live traps, and tamper-resistant bait stations. Each handles a different problem, and none replaces sealing the openings mice use.
Match the device to the runway
Snap traps are usually the clearest first choice when you can reach confirmed travel routes. They kill quickly, cost little per unit, and show what has been removed. Set them across active runs, with the trigger end against the edge mice follow, such as a truss face or framing line. Placement matters. Check them frequently, especially if children, pets, or service workers could enter the attic.
Multi-catch live traps suit a defined route, including a soffit-to-attic transition or narrow void. They avoid a visible kill, but they create a daily inspection obligation. A captured mouse still needs prompt attention, and an ignored trap can become an odor and animal-welfare problem.
Bait stations have a narrower role. Consider them when access is limited or the routes are too widespread for practical trap coverage. Rodenticide places a toxicant inside a living structure and may leave mice dead in inaccessible voids, so bait is rarely the sensible casual first response in an attic.
| Method | Best Use | Drawbacks | Cost per Catch |
|---|---|---|---|
| Snap traps | Accessible, confirmed travel routes | Require precise placement and repeated checks | Low, but varies with trap quality and reuse |
| Multi-catch live traps | Defined voids and soffit transitions | Need consistent inspection and live removal | Varies by device and handling |
| Tamper-resistant bait stations | Inaccessible runs or difficult layouts | Toxicant exposure and hidden carcass risk | Varies by product and service plan |
Bait for behavior, not wishful thinking
Food bait can work, but nesting material often performs better in a quiet attic. A small amount of cotton or dental floss may interest a mouse inspecting a nesting route. Use only enough to attract attention. Too much bait can let a mouse feed without putting its weight on the trigger.
Keep traps and stations away from heavily contaminated areas until safe handling has been planned. The device count is not the measure of a good setup. Each trap should sit on evidence, be checked on schedule, and support removal before the entry points are sealed. That order prevents a quiet attic from being mistaken for a mouse-free one.
The Sequence Question, Trap First or Seal First
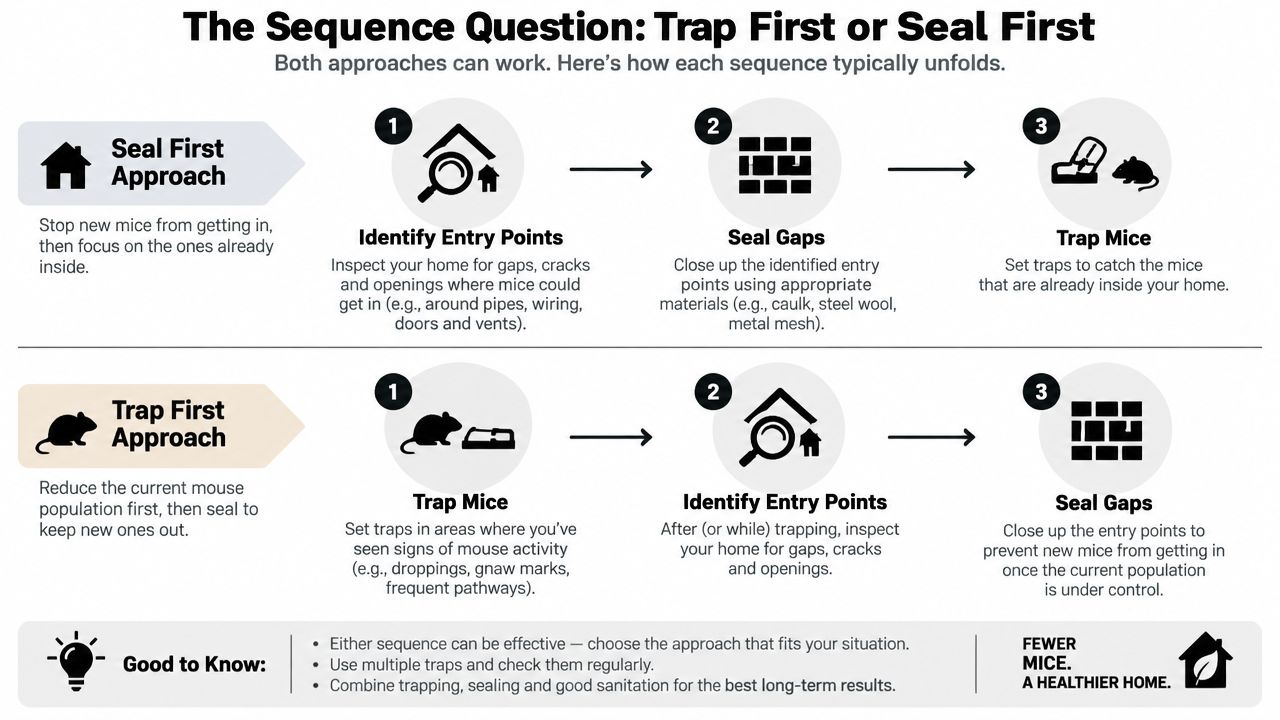
Seal first, and you stop new mice from entering. Trap first, and you reduce the population before disturbing the routes they use to move between the roofline, attic, and walls. Both arguments contain truth, which is why homeowners get conflicting advice.
For a typical single-family home with a manageable attic infestation, the practical sequence is to trap and monitor active mice first, then complete exclusion after activity has fallen away. Keep traps along the perimeter while the sealing work is underway. This approach follows integrated pest management guidance that combines inspection, exclusion, sanitation, and trapping rather than relying on a single chemical or device. Penn State Extension's IPM guidance supports that integrated approach and notes that mice generally exploit existing openings rather than creating new ones.
When trap first makes sense
Begin with traps when you can identify the runs and the attic is separated from finished living areas. The goal isn't to wait for a random catch. It's to place devices where the mice already travel, inspect them consistently, and watch for fresh droppings, tracks, and movement.
Activity should remain absent for 7 to 10 consecutive days before you treat the attic as ready for final exclusion. That interval comes from the workflow in this brief, not from a guarantee that every infestation follows the same timetable. Keep a few traps active during sealing because construction noise and movement can change the mice's routes.
When the order should change
Seal sooner when the attic has multiple obvious entry points, a heavy infestation, a winter-established colony, or direct connections to finished rooms. In those cases, leaving openings open can allow continued recruitment, while disturbance may push mice toward occupied areas. A professional can stage one-way exits, trapping, and repairs so the animals do not move into walls.
The attic is mouse-free only when silence is supported by evidence. Check traps, inspect fresh sign, and verify the repairs. Quiet alone is not a confirmation.
A company's approach to another pest issue can be summarized as “treat the colony, not just the trail,” as shown in Pestless's Ant Control description. The same principle applies here, but the target is the entry system and the resident population, not just the noise you hear.
Sealing Entry Points the Mice Are Using
Once trapping has reduced activity, inspect the exterior from the roofline down. Work safely. If a location requires roof access or a ladder position you can't control, use a licensed professional rather than turning an exclusion job into a fall hazard.
Start with the upper openings:
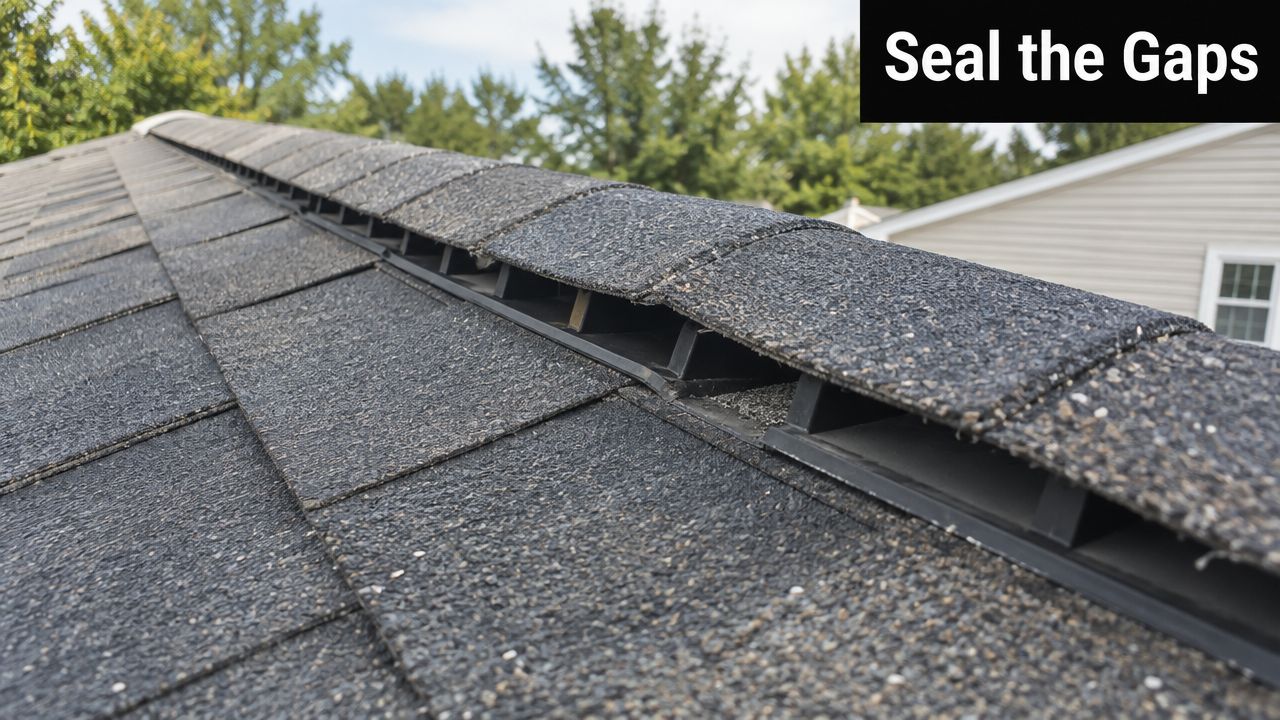
- Ridge and gable vents: Look for missing screens, lifted covers, and gaps where the vent meets the roof or sheathing.
- Soffit and fascia joints: Check the soffit-to-fascia seam and the point where roof sheathing meets the fascia board.
- Roof-wall transitions: Inspect dormer step flashing, kick-out flashing, siding terminations, and corners where wind-driven rain can loosen materials.
Pair metal with sealant
NCSU guidance recommends tight attic and crawl-space doors and 1/4-inch-mesh hardware cloth on vents where screening is needed. North Carolina State University's structure-mouse guidance also reflects the broader exclusion principle: openings need durable barriers, not temporary filler.
For vent repairs, use galvanized hardware cloth with the edges mechanically secured using screws or wire. Copper or stainless-steel mesh can suit soffit gaps and penetrations. For a larger opening, use metal backer material with an elastomeric sealant, so the sealant closes the irregular edges while the metal resists chewing.
The rodent exclusion materials guide is useful when comparing barrier options, but the installation detail matters as much as the material. Foam alone is not a rodent-proof barrier. Plastic mesh can be chewed or degraded, and steel wool buried in caulk can rust and lose its integrity.
Continue around every penetration:
- Plumbing vent stacks
- Bathroom and dryer exhausts
- Satellite, solar, and antenna mounts
- Cable and electrical penetrations
- Gaps around ductwork and conduit
After repairs, check the work with a smoke pencil where airflow is present, or use a thermal inspection to locate temperature changes around suspect joints. The objective is to confirm that the gap is closed, not to cover the area with a product that looks finished.
The video below shows why roof-vent details deserve close attention during exclusion.
Don't forget the attic hatch and weatherstripping. A well-sealed roofline won't help if the access panel has a loose frame or an open corner that leads directly into the insulation.
Cleaning Up Droppings and Contaminated Insulation Safely
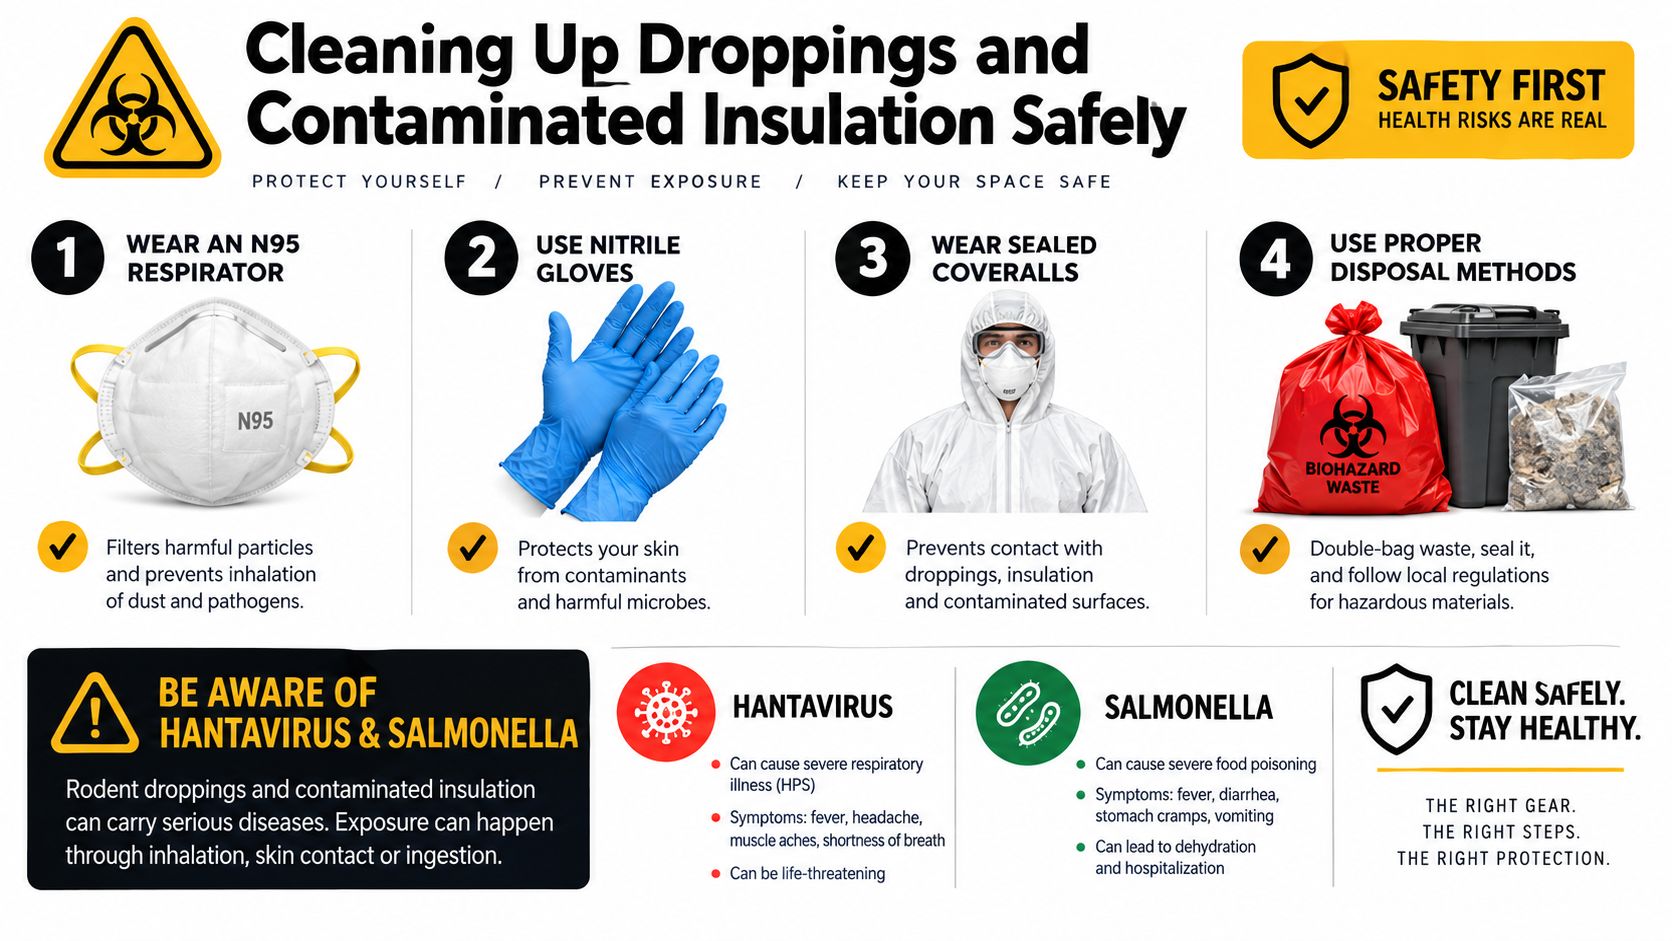
Removal isn't the end of the job. Droppings, urine, nesting material, and dead animals can remain after the attic goes quiet, and disturbing dry contamination can spread particles through the space. Hantavirus and salmonella are among the health concerns associated with rodent contamination, so cleanup deserves more care than ordinary sweeping.
Use the wet method
Wear a properly fitted N95 or P100 respirator, nitrile gloves, and sealed coveralls. A basic dust mask doesn't provide the same protection, and a household dry vacuum can aerosolize particles.
Lightly mist droppings, urine trails, and nesting material with an enzyme-based disinfectant or an appropriately diluted bleach solution. Let the solution dwell for several minutes, then wipe or collect the softened material. Don't sweep it dry, and don't start with a standard vacuum.
A HEPA-equipped vacuum can support the final cleaning pass after contaminated material has been dampened and removed. Bag waste in heavy-duty sealed mil bags, clean tools before taking them through the house, and keep the attic isolated from occupied rooms as far as the layout allows.
Decide what happens to the insulation
Not every affected patch requires the same response. A small area of blown-in cellulose may be treatable if contamination is limited and the material remains dry and intact. Fiberglass batts may be assessed for localized surface damage, but nests and urine can settle through layers where a quick surface cleaning won't reach.
Replacement becomes more reasonable when insulation is saturated with urine, contains extensive nesting, or carries a dead-animal odor that persists after removal of accessible material. Don't compress or redistribute contaminated insulation into clean areas. Mark the boundary, remove affected material carefully, and have a qualified insulation or remediation contractor evaluate the assembly when the damage is broad.
Protect the air pathway
Check for return-air leaks, gaps around duct boots, and contaminated duct sections near the attic floor. If droppings or nesting material appear beside a return, stop before using air movement to “clear” the space. A duct-cleaning or HVAC professional can determine whether a section needs cleaning, sealing, or replacement.
Finish with a HEPA vacuum pass, sealed disposal, and cross-ventilation. Keep respiratory protection on until the cleanup is complete and the area has been ventilated according to the disinfectant instructions. If you're unsure whether the insulation or HVAC system is contaminated, that's a good point to hand the work to a specialist.
Keeping Mice Out for Good and Knowing When to Call a Pro
Exclusion works best as maintenance, not as a one-time repair. Miami weather, roof work, wind, settling, and changes around vents can create new openings even after a careful job. Put the attic on a recurring inspection schedule so a small defect doesn't become another nesting site.
Build a repeatable exterior check
Walk the exterior every quarter and after major wind events. Focus on the roofline, soffits, ridge vents, flashing, utility penetrations, and the weatherstripping around the attic hatch. Clear debris from gutters and roof valleys, because trapped moisture can loosen adjoining materials and hide defects.
Keep vegetation trimmed back from the roofline. Branches and dense growth can give rodents protected access to upper walls and roof edges, while clutter against the house can conceal additional routes. Inside the attic, keep stored goods raised and avoid creating deep, undisturbed pockets beside the eaves.
A few non-bait snap traps can serve as passive sentinels along the attic perimeter. Check them monthly, and remove or reposition them if the attic is used for storage or service access. The point is early detection, not permanent dependence on traps.
Watch the seasons
Fall food shortages can push rodents toward sheltered structures, while spring inspections often reveal damage that occurred during the wetter or colder period. In coastal areas, storms can loosen soffits, flashing, and vent covers, so a post-storm roofline check is worthwhile.
The handoff to a licensed pest professional is clear when:
- Droppings return after exclusion: Repeated fresh signs usually mean an overlooked opening or activity elsewhere in the structure.
- Insulation is broadly affected: Saturation, nesting, or persistent odor can require controlled removal and replacement.
- HVAC components are involved: Return-air leaks and contaminated duct sections affect the air pathway into occupied rooms.
- Wiring or vent lines are damaged: Chewed electrical wiring and compromised gas-vent components require qualified trade review.
- Odors persist: A continuing smell after cleanup can indicate hidden carcasses, soaked materials, or inaccessible contamination.
Pestless Inc. connects Miami and Miami-Dade homeowners with licensed, insured pest professionals for rodent problems and other household pests. It doesn't perform treatments itself, but it routes requests to local providers so homeowners can compare a no-obligation quote and choose a qualified service path.
If you're hearing movement or finding fresh droppings, Pestless Inc. can connect you with a licensed, insured Miami-area pest professional for inspection, trapping, exclusion, and cleanup guidance. Submit the short request with the attic details, including visible entry points, wiring damage, odor, and insulation condition, so the matched provider can assess the full job rather than just set a few traps.
Dealing with this pest right now?
Pestless connects you with a licensed, insured Miami pest control provider for a free, no-obligation quote.