The most popular advice about how to eliminate chipmunks starts with baiting a trap and driving the animal somewhere else. That skips the harder questions: what's attracting chipmunks, where are they getting in, and is releasing a captured animal somewhere else even legal?
A better objective is to eliminate access and damage, not every chipmunk in the neighborhood. Protect the building and vulnerable plantings, remove the easy food, and reserve trapping for a defined problem with a lawful handling plan.
Table of Contents
- Match Your Chipmunk Problem to the Right First Fix
- How to Seal Entry Points and Protect Garden Beds
- How to Set Traps Where Chipmunks Actually Travel
- Remove Cover and Food That Keep Chipmunks Coming Back
- Legal Limits on Trapping and Relocating Chipmunks
- Decide Whether to Call a Licensed Pest Professional
Match Your Chipmunk Problem to the Right First Fix
A chipmunk crossing the patio isn't the same problem as an animal entering a wall. Treating both situations with traps wastes effort and can leave the actual building defect untouched.
University of Georgia Extension's guidance on chipmunks in the landscape emphasizes habitat modification and exclusion as foundational controls. That distinction matters: removing an animal doesn't remove the sheltered route, accessible seed, or opening that attracted it.
Start by deciding whether you need a yard redesign, a physical barrier, or a professional inspection. Don't assume that every hole belongs to a chipmunk, particularly if you haven't watched an animal use it.
Chipmunk situations and the first fix
| Situation | Likely sign | First action |
|---|---|---|
| Digging in flower and bulb beds | Fresh holes, dug-up bulbs or seeds | Protect the planting area with fine hardware cloth and secure its edges against digging |
| Burrows along foundation, patio or deck | Holes at building edges or freshly disturbed soil against walls | Map entrances, inspect structural gaps, and identify travel routes before choosing removal |
| Gnawing or nesting sounds in walls or attic | Scratching, nesting sounds, or chewed openings around pipes or vents | Identify the animal and inspect entry points before sealing; consider a professional inspection |
| Visiting bird feeders | Spilled seed under feeders near the house | Move feeding activity away from the building and clean up spilled seed |
| Dense ground cover or woodpiles touching the house | Animals moving along a continuous cover route | Break the route with cleared gaps and remove debris piles |
For bed damage, the escalation sign is activity continuing toward the building rather than staying around plants. At feeders, it's animals carrying food into a structural opening. Around decks and foundations, look for an actual entry into the building, not a nearby burrow.
Noise inside a wall already warrants closer investigation. Nighttime scratching alone doesn't identify chipmunks, and setting chipmunk traps without confirming the species can send the entire job in the wrong direction.
Practical rule: A burrow beside a foundation deserves inspection, but it isn't proof that an animal has entered the house.
Run a weekend perimeter check
Walk the outside with a flashlight, then watch from a distance when animals are active. Photograph fresh digging, pipe penetrations, vent damage, and routes beneath steps.
Activity confined to beds and feeders points toward yard work. Fresh digging against the foundation, chewed openings, or animals disappearing around utility lines calls for structural investigation. Don't plug an occupied opening just to see what happens.
How to Seal Entry Points and Protect Garden Beds
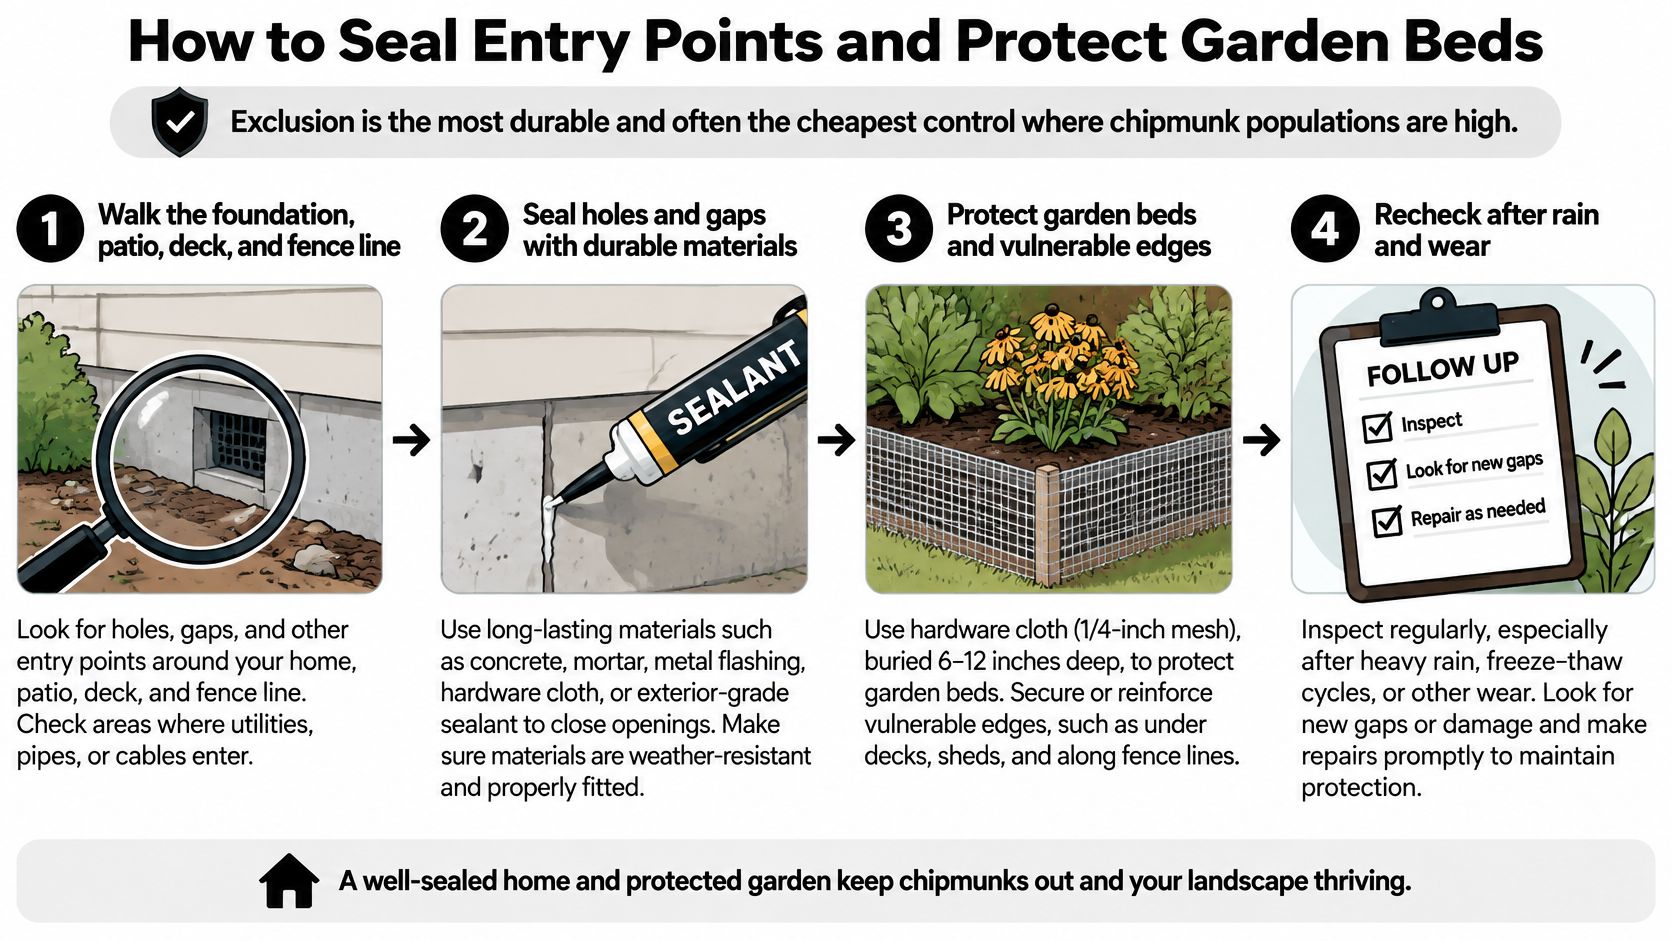
Exclusion is usually the more durable investment because a sound barrier keeps working after a trap is removed. Penn State Extension says exclusion is often less expensive than trapping where chipmunk populations are high and recommends mesh no larger than one-quarter inch, planting coverage extending at least 1 foot beyond every margin, and bird feeders 15–30 feet from buildings.
Use the following visual as a work sequence, not permission to seal openings before checking for animals inside.
Inspect before closing anything
Walk the entire perimeter. Carry a flashlight, inspection mirror, gloves, and a camera. Check the foundation, patio, deck, shed, vents, door corners, and utility penetrations, including places hidden behind stored equipment.
Separate cosmetic cracks from usable openings. Mark damaged screening, loose vent frames, and gaps with fresh rubbing or gnawing. If you suspect animals are inside, arrange identification and removal before permanent closure so you don't trap them in the structure.
Match the repair to the surface. Use exterior sealant for suitable small, stable joints. Fasten metal mesh to sound material with screws and washers or an appropriate retaining frame; a patch attached only to crumbling trim won't hold.
Caulk isn't a substitute for metal where an animal can chew or pull at the repair. Keep ventilation and drainage paths functional, and don't cover combustion exhausts or alter utility equipment without the appropriate trade professional.
For a broader inspection checklist, use this guide to rodent-proofing your home. When comparing wire products, XTREME EDEALS INC.'s welded mesh fencing buying tips can help you evaluate materials, but fencing with large openings isn't a substitute for fine exclusion mesh.
Exclusion specifications by location
The building, planting-margin, and feeder specifications below follow Penn State's recommendations. For buried barriers, Connecticut's chipmunk fact sheet summarizes Kentucky guidance calling for burial at least 6 inches deep and Indiana guidance calling for bulb protection to extend at least 1 inch beyond the protected edge.
| Location | Barrier and material | Measurement |
|---|---|---|
| Building openings, vents and utility penetrations | Caulk for suitable small gaps; hardware cloth for larger openings | Mesh no larger than the quarter-inch specification |
| Planting areas and seed beds | Hardware cloth laid over the planting area and covered with soil | Extend beyond every margin using the Penn State specification |
| Bulb beds where digging is active | Buried hardware cloth with protected edges | Use the burial depth and bulb-edge extension stated above |
| Bird feeders | Relocate away from the structure | Use Penn State's building setback stated above |
| Ground cover, shrubs and woodpiles | Interrupt routes between woods and foundation | No unbroken connection to the foundation |
Fit the planting barrier before covering it. Measure the full vulnerable area, cut mesh with tin snips, and fold sharp edges safely away from hands and stems. Plan openings for established plants without leaving broad access gaps.
Protect the perimeter, not just the middle. Where animals are digging, secure or bury the edges rather than laying a loose rectangle on top. A chipmunk can approach from the side even when the center is well covered.
Inspect after disturbance. Recheck after heavy rain, gardening, mowing, and contractor visits. Look for lifted edges, washed-out soil, and loosened fasteners rather than assuming an intact-looking surface means the barrier is secure.
Covering only the top of a bed is a common failure. The edges need the same attention as the center.
How to Set Traps Where Chipmunks Actually Travel
A trap in a convenient spot isn't necessarily in a useful spot. Map occupied burrow entrances and repeated travel lanes before putting equipment down, and resolve the legal handling question before catching anything.
The placement below illustrates the kind of sheltered building-edge location to inspect, although the actual setup must suit the site and protect other animals.
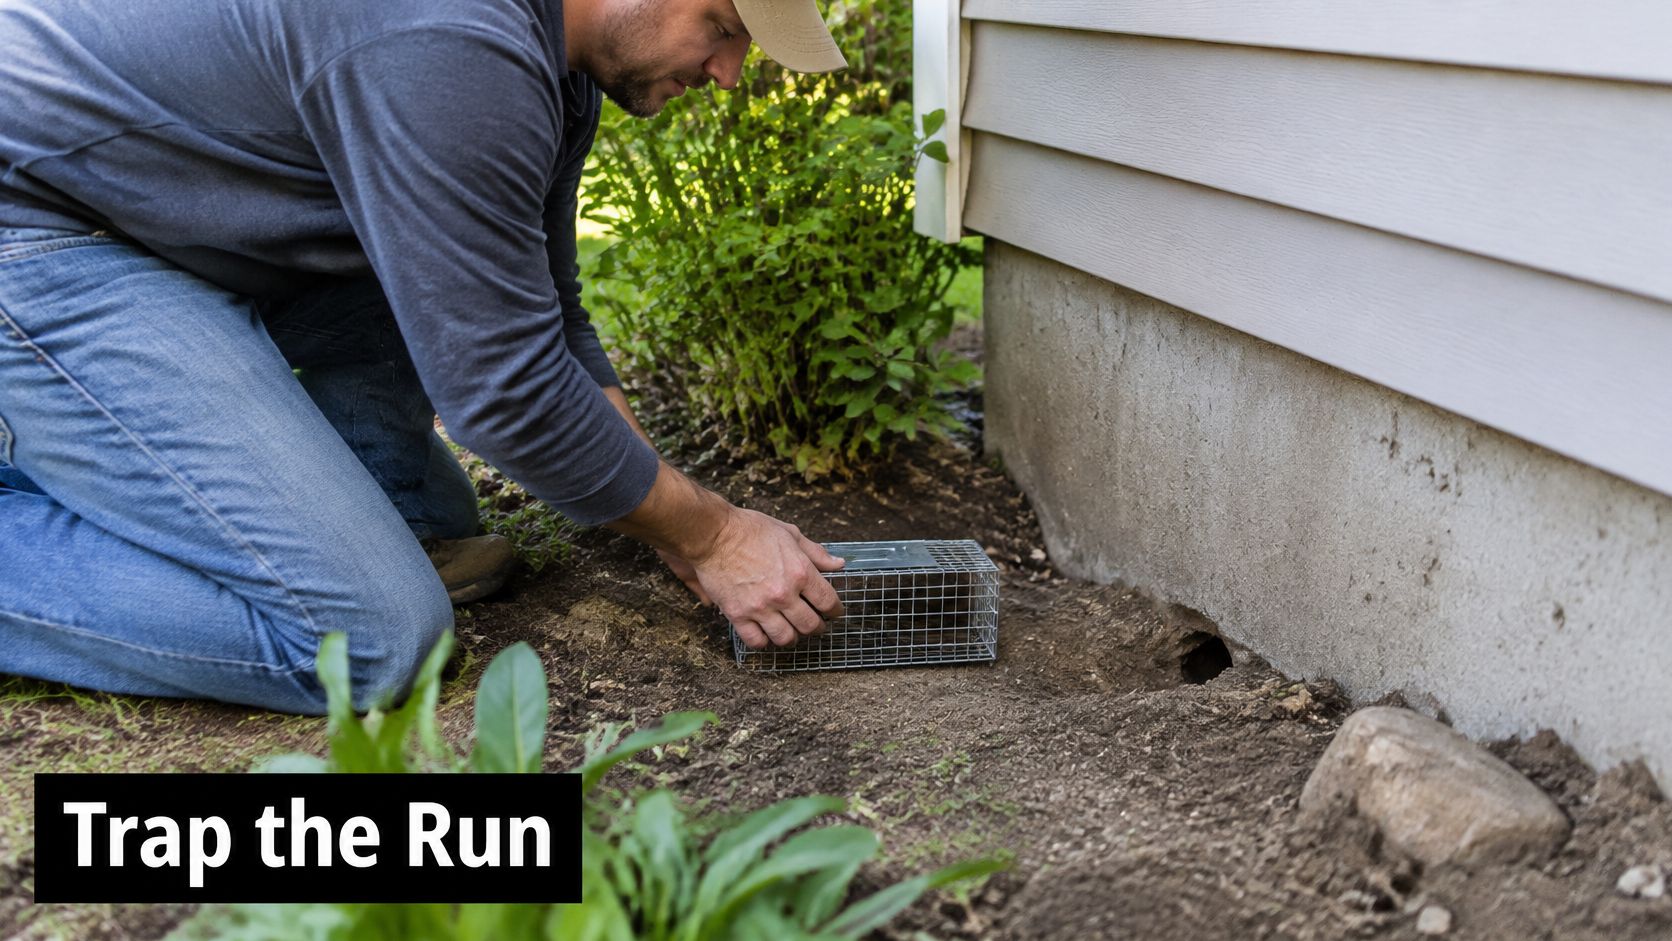
Build the setup around observed movement
Watch before baiting. Note where animals emerge, pause, and disappear. Distinguish a routinely used runway from a spot where you happened to see an animal once.
Choose equipment you can manage responsibly. A live-catch wire trap requires an approved plan for the captured animal. A rat-sized snap trap is lethal and needs a protective enclosure, careful positioning, and restricted access.
Use a small, secured bait portion. Peanut butter mixed with rolled oats is practical because it adheres to the trigger area. Sunflower seeds, pumpkin seeds, or raisins are alternatives; scattered bait outside the trap encourages feeding without capture.
Fit the entrance setup precisely. The Missouri Department of Conservation's chipmunk-control guidance supports live-catch and rat-sized snap traps; the accompanying Kentucky placement benchmark calls for two snap traps per entrance, adjacent and perpendicular to the opening, level with the surrounding surface, with a cover or 6-inch-diameter PVC tunnel.
Prevent shifting. Set the trap on a firm surface and secure it according to its design. A rocking trap or moving enclosure can interfere with triggering and discourage entry.
Plan checks before deployment. Check live traps daily, and more frequently when conditions or local requirements demand it. Don't deploy a trap before leaving the property unattended.
The daily checking interval is a minimum husbandry instruction, not a guarantee that a trap is safe in heat or direct sun. If you can't protect and monitor a live trap, don't set it.
Trap types compared for chipmunk removal
| Trap type | Best use | Main risk | Handling step |
|---|---|---|---|
| Live-catch wire trap | Active travel lanes near burrows and feeders | Stress or injury; release may be prohibited | Check daily and establish the lawful disposition before capture |
| Enclosed rat-sized snap trap | Burrow entrances and runways | Catching non-target animals if exposed | Use an enclosure that prevents access by songbirds and pets |
| Paired snap traps with PVC tunnel | Burrow entrances where a protected setup is feasible | Pets or wildlife reaching the traps through an inadequate cover | Position adjacent and perpendicular, level with the surface, using the tunnel specification above |
| Peanut butter and rolled oats bait | Bait option for compatible traps | Drawing other animals toward the trap line | Keep bait on the intended trigger area and secure the equipment |
An enclosure reduces risk; it doesn't make every location safe. A tunnel open to a curious pet still needs restricted access. If you can't prevent non-target contact, choose another location or bring in a wildlife professional.
This rodent-control equipment guide provides broader equipment context. The Rodent Control service description pairs removing rodents with sealing the way back in; confirm chipmunk handling specifically with any provider you contact.
For a visual supplement to the setup discussion, the following video is available.
Don't judge the work solely by captures. Record trap location, bait condition, captures per trap-day, sightings, and reopened entry points. There's no defensible universal homeowner success percentage here, and an empty trap can mean poor placement rather than an empty property.
Remove Cover and Food That Keep Chipmunks Coming Back
Say a townhouse has a hedge connecting a wooded lot line to the back patio, with stacked firewood beside the rear wall. In that situation, setting a trap beside the patio leaves both the sheltered approach and the hiding place untouched.
The useful first changes are straightforward: interrupt the hedge route and move the wood away from the building. This is a hypothetical layout, not a promise that pruning alone will resolve an occupied structure.
Clear the building edge first
Start with brush, loose boards, unused planters, and debris touching the foundation. Relocate usable firewood to an orderly storage area with space around it for inspection, rather than transferring the same concealed corridor to the opposite wall.
Before hiring someone to haul vegetation, check municipal collection requirements and disposal restrictions. Richmond Tree Experts GA's discussion of local rules for brush disposal is a useful reminder to verify local requirements rather than leaving cut brush piled against the house.
Next, interrupt continuous shrubs and ground cover between wooded edges and the building. You don't need to strip the property bare, but you do need enough visibility to inspect the foundation and spot renewed activity.
Make food cleanup routine
- Maintain the perimeter. Keep grass short along building edges and remove fallen fruit, nuts, and accumulated seed from access routes.
- Bring pet food inside. Don't leave an outdoor bowl available between meals, and store bagged food in a durable, closed container.
- Manage compost deliberately. Use a maintained enclosure and avoid accessible food scraps around its base.
- Check feeder habits. Catch or sweep spilled seed rather than continually adding fresh food above an accumulating pile.
A rental property's landscaping and housekeeping responsibilities should be explicit. If the tenant feeds birds while the landscaping crew leaves brush along the fence, a trapping contractor can't correct those conditions during a brief visit.
Maintenance test: You should be able to inspect the building edge without moving a pile of belongings or crawling through dense vegetation.
There's no reliable calendar deadline for habitat changes to stop visits. Compare observations under similar conditions, and look for fewer approaches to the building, less fresh digging, and no renewed seed accumulation. A repaired opening can block that route immediately, but continued yard activity doesn't automatically mean the repair failed.
Legal Limits on Trapping and Relocating Chipmunks
A live trap isn't automatically humane, and a wooded release site isn't automatically lawful. Once you've captured an animal, you need an answer that complies with local rules, not an improvised drive to a park.
The New York State Department of Environmental Conservation prohibits releasing a live-trapped animal in a park, on state land, or anywhere other than the property where it was captured, and warns that relocation can spread disease, create neighbor conflicts, and cause unnecessary stress. Don't transfer advice from another state to your property.
Even where capture is allowed, the trap type, handler, release location, and disposition may be regulated separately. A property owner's permission to enter land doesn't necessarily authorize wildlife release there.
Answer these questions before capture
- What species is present? Obtain a clear observation or professional identification rather than relying on scratching sounds or a hole.
- Is this trapping method permitted? Ask the relevant wildlife authority about the proposed device and location.
- Can the animal legally be released? Confirm whether release is allowed, where it may occur, and whether authorization is needed.
- Who may handle it? Verify whether the work requires a licensed wildlife operator or another authorized person.
- What happens if release isn't permitted? Have an agency-approved disposition plan before setting the trap.
- How will the entry point be repaired? Assign responsibility for closure and inspection so removal isn't the end of the work order.
Don't handle a captured chipmunk with bare hands or open a cage where children and pets can approach it. If the animal is injured or the situation differs from the plan, contact the wildlife authority or an appropriately qualified professional.
Document the decision on managed properties
Landlords, HOA boards, and property managers should keep the species identification, contractor credentials, trapping authorization, and disposition record with the repair scope. Tenants also need clear instructions about avoiding traps and reporting activity without moving equipment.
Avoid vague work orders that say only “remove chipmunks.” Name the affected location, agreed method, monitoring responsibility, and closure work.
When the legal answer is unclear, pause trapping. Exclusion planned around animal occupancy and jurisdiction-specific professional guidance may be safer than creating a captured-animal problem you aren't authorized to resolve.
Decide Whether to Call a Licensed Pest Professional
Call for help when identification, access, safety, or compliance exceeds what you can confidently manage. A difficult-to-reach opening above a crawlspace or an animal inside a wall isn't just a larger version of a damaged flower bed.
Use a site checklist to keep the conversation focused on evidence and repairs.
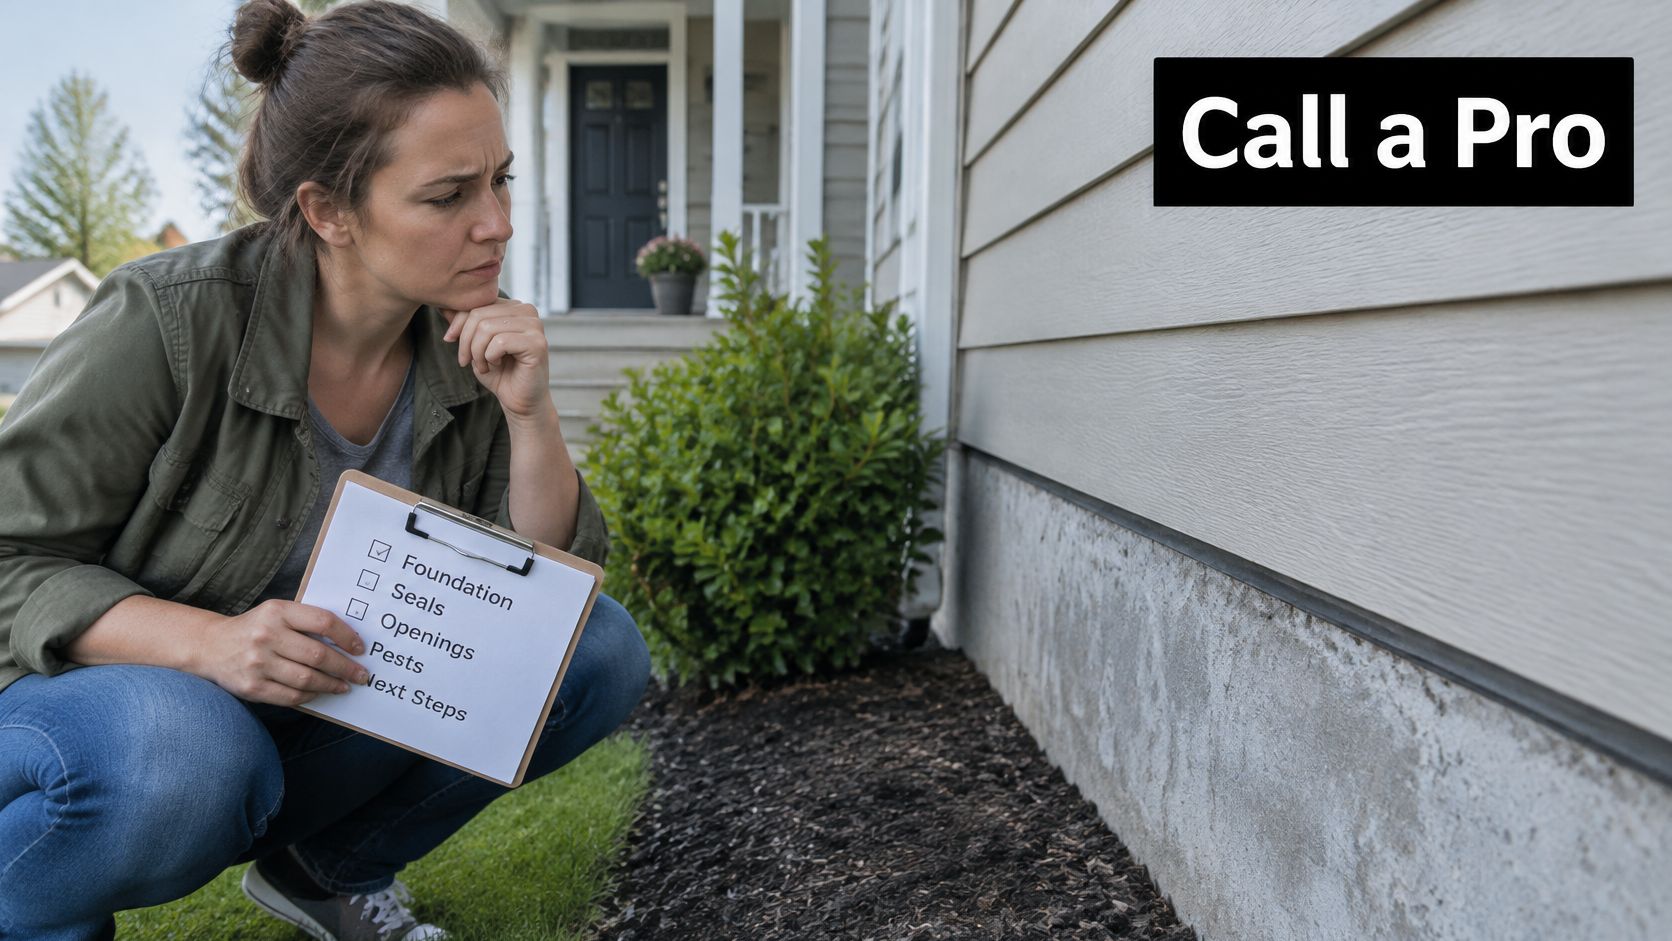
Situations that justify a professional inspection
- Repeated structural entry. Animals continue entering after attempted repairs, or you're finding fresh damage around patched areas.
- Activity in enclosed spaces. Sounds, nesting material, or sightings point to walls, the attic, or a crawlspace.
- Uncertain identification. Signs may involve chipmunks, other rodents, raccoons, or more than one species.
- Managed-property obligations. A rental, condominium, or HOA needs a documented plan and clearly assigned responsibilities.
- An inspection or sale deadline. You need a written assessment rather than another round of trial-and-error repairs.
- Non-target captures. Traps are catching birds or other animals, indicating that the current setup needs to stop and be reassessed.
For Miami-area properties, don't let a presumed species determine the service request. Send photographs and describe the behavior so the provider can establish what animal is involved.
Verify the repair scope before hiring
Ask for a current license appropriate to the work and active liability insurance. This guide to choosing a licensed pest-control professional can help you organize those checks, but verify wildlife-handling authority separately where required.
The written proposal should identify entry points, repair materials, inaccessible areas, and any work excluded from the price. It should also explain the lawful capture or disposal plan, who checks traps, and what happens if a different species appears.
Ask whether a recheck or warranty is included and what conditions apply. Landscaping changes, tenant feeding practices, and later contractor damage can affect the result, so the agreement should distinguish a failed repair from a newly created opening.
Homeowners and property managers can contact wildlife specialists directly, seek an agency referral, or use a provider-matching service. Whatever route you choose, confirm that the selected contractor handles both the animal and the structural work; a general pest-treatment appointment may not include either.
The most useful outcome isn't a photograph of a captured animal. It's a correctly identified problem, a lawful resolution, and a building or planting area that no longer offers the same access.
Pestless Inc. connects Miami and Miami-Dade County homeowners and property managers with licensed, insured local pest professionals through no-obligation quote requests at no cost. Visit Pestless Inc. to describe the activity and request a connection, then confirm that the chosen provider handles rodent and wildlife work, including exclusion. Pestless facilitates introductions and doesn't perform treatments itself.
Dealing with this pest right now?
Pestless connects you with a licensed, insured Miami pest control provider for a free, no-obligation quote.