The advice you'll find everywhere is to measure the droppings. Under a quarter inch means mouse, over half an inch means rat, case closed. It's tidy, easy to repeat, and it fails often enough to cost people real money, because a dried rat pellet shrinks, a young rat's pellet looks nothing like an adult's, and neither looks like much of anything after three weeks on a garage floor.
After years of reading rodent sign, I'd rank identification third on the list of things that matter. What changes your next step is where the droppings sit, whether they come back after a proper cleanup, and how you remove them. Species matters, but mostly as confirmation.
So treat the size test as a screening tool that narrows the field, and treat the health and cleanup questions as the ones that decide your week. Here's how to read the pellets, then what to do about what you find.
Table of Contents
- Rat vs Mouse Droppings at a Glance
- Why Pellet Count and Location Matter
- Reading Fresh, Old and Mixed Droppings
- Health Risks That Depend on Location
- How to Clean Droppings Without Spreading Dust
- Finding the Entry Points Rodents Use
- Call a Licensed Pro When Droppings Keep Returning
Rat vs Mouse Droppings at a Glance
Start with the pellet in your hand and a ruler; a phone photo of someone else's pellet compresses scale and flattens shape. Lay what you find against the table below and compare the whole row, because length alone sends more people down the wrong path than any other single measurement.
| Dropping source | Typical length | Shape | Typical daily count |
|---|---|---|---|
| House mouse | 3-6 mm (1/8-1/4 in) | Narrow, pointed at one or both ends | About 50-60 per mouse per day |
| Norway rat | 19-25 mm (3/4-1 in) | Thick, capsule-shaped, blunt ends | About 40-50 per rat per day |
| Roof rat | About 13 mm (1/2 in) | Spindle-shaped, pointed ends | About 40-50 per rat per day |
The length figures and daily counts in the table are typical ranges from Cornell IPM's guide to mouse and rat biology and behavior and its companion on managing mice and rats; set the two length extremes side by side and a Norway-rat pellet runs roughly three to eight times the length of a mouse pellet.
The mouse row is the one generally recognized correctly at a glance: pellets the size of a rice grain, tapered at one or both tips, scattered rather than stacked. The Norway-rat row gets misjudged more often, because a capsule shape with rounded ends looks less alarming in isolation than it does next to a dime. The roof-rat row captures the in-between pellet, longer than a mouse's, thinner than a Norway rat's, pointed and slightly curved.
Counts run counterintuitively. Per animal, a mouse produces more individual pellets each day than a rat does, so a single busy mouse can out-deposit a rat in sheer pellet number while the rat leaves the heavier total volume behind.
The U.S. National Park Service gives a different rat range on its guidance for museum collections, with mouse droppings at 1/8-1/4 inch and rat droppings at approximately 1/2-3/4 inch (NPS Conserve O Gram on identifying mouse and rat damage). The gap at the rat end comes down to grouping: that figure covers rat droppings generally, while Cornell separates Norway from roof rat, and roof rats pull the low end down.
Practical rule: Measure five pellets, not one, and write down whether they all land in the same range. A mix of sizes is a different answer than five matching pellets.
When a length lands between rows, let shape break the tie: blunt capsule ends lean Norway rat, a pointed spindle leans roof rat, and fine tapered tips stay mouse. Pellets also shift with the animal's age, diet, and time since they landed, which is why five consistent measurements outweigh one dramatic outlier every time.
Why Pellet Count and Location Matter
Quantity and placement tell a more useful story than species. A pantry with dozens of small pellets doesn't necessarily mean a crowd. One mouse working a kitchen nightly can produce a startling volume on its own, so the number of pellets overstates the number of animals far more often than people expect.
Rats behave differently, and their sign shows it. They follow the same routes night after night, so their droppings cluster along a runway, near a burrow, or beside a reliable food source rather than spreading evenly. Mice wander. A room with pellets in six unrelated corners reads as mice exploring. A single dense pile behind a garage shelf reads as a rat commuting.
Where you find the material narrows the list further:
- Kitchen baseboards, drawer backs, cabinet interiors, pantry corners: mouse territory, because the food and the travel edge are both there.
- Under sinks and behind appliances: mice again, following the plumbing line and the warmth.
- Wall voids, garages, crawlspaces, under the kitchen sink cabinet floor: Norway rat, working low and protected.
- Attics, soffits, garage rafters, ceiling spaces: roof rat, arriving from a tree limb or utility line rather than a ground gap.
Counting is the easy part. Reading placement is what turns a pile into a route, and a route into an entry point. If you want the fuller catalog of what rodents leave behind besides feces, this guide to rodent infestation signs covers gnaw marks, grease trails, and nesting material.
The recurrence test that settles activity
Fresh droppings prove a rodent was there. They don't prove one is there now. The test is simple and it's the one I trust most: clean the area properly, then leave a marker. A light dusting of flour along the baseboard, or a sheet of clean paper on the shelf, works fine.
Check it after three to five days. New pellets on the marker mean an active animal. An untouched marker means you cleaned up an old trail.
- One old pile, no return: a past visit, possibly weeks old.
- New pellets on the marker: current activity, and now you need a plan.
- Fresh sign in rooms you never found sign in before: a spreading population, not a straggler.
A single discovery is a data point. A pattern across days is an infestation.
Reading Fresh, Old and Mixed Droppings
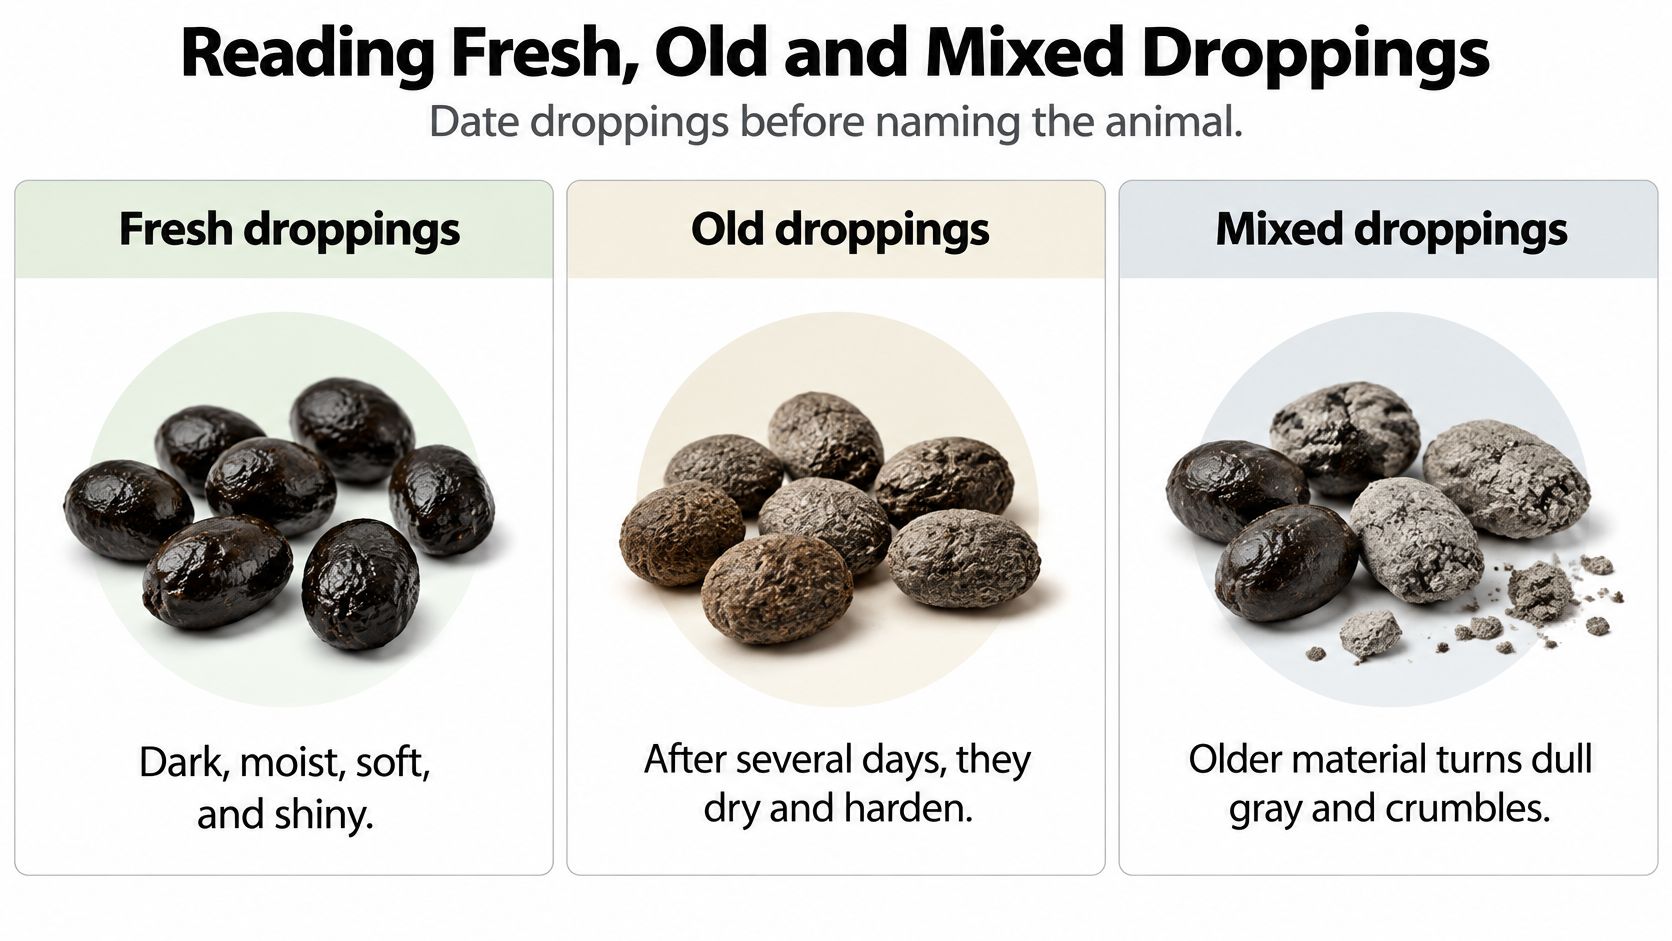
Date the droppings before you name the animal, because age changes the measurement. Fresh material is dark, moist, soft, and shiny. Within a few days it dries and hardens. After a few weeks it turns dull gray and crumbles when you touch it with a paper towel.
That timeline matters more than most guides admit. A dried rat pellet can look shorter and thinner than it was when fresh, which pushes it toward the mouse column on a careless comparison. A pellet that crumbled to powder isn't a size clue at all anymore.
Penn State Extension's mouse-control guidance treats droppings as one clue among several rather than a species test on their own (Penn State Extension on eliminating mice with IPM). That's the right frame. Pair the pellet with what's around it.
A pellet that dried three weeks ago is smaller than the same pellet was when it landed.
Three questions before you commit to a species
Run these in order, and stop if any answer comes back unclear.
- Are these pellets the same age? Compare color and texture. Shiny and soft next to dull and hard means two deposits, possibly two animals, possibly months apart.
- Are the sizes consistent within one cluster? A tight pile of identical pellets is one rodent. A pile with pencil-eraser pellets and rice-grain pellets is adults plus juveniles, or two species sharing a run.
- Do they sit along a route? Pellets tracing a line beside a wall are travel sign. Pellets in a loose scatter near a food source are feeding sign.
Mixed material adds a Miami-specific wrinkle. Cockroach feces lands in the same cabinets and behind the same appliances, and German cockroach droppings look like coarse black pepper rather than a shaped pellet. In a restaurant or a rental unit that's been cleaned by several people, old rodent sign, roach specks, and debris from a recent move all sit within a foot of each other.
When the answer still isn't clear, photograph a sample beside a ruler, in daylight, with the location noted. An extension office or a technician can read that photo faster than a description, and the ruler gives the image a scale that a bare close-up loses.
Health Risks That Depend on Location
A pellet beside a cereal box and an identical pellet on a garage rafter are the same evidence and two different jobs. The first means exposed food goes in the trash today. The second can wait for a weekend, a mask, and a wet cleanup. What the droppings sit near decides which situation you're in.
The risk itself doesn't split cleanly by species. Rodent waste can contaminate food, surfaces, and air, and transmission can happen through direct contact with droppings or by breathing dust that carries them (CDC rodent control guidance). Rodents also spread disease indirectly through contaminated food and through parasites they carry, including ticks, mites, and fleas.
| Location | Main concern | Immediate action |
|---|---|---|
| Food storage, pantry or cabinets with food | Contamination of food and food-contact surfaces | Discard exposed food, isolate the area, and sanitize before use |
| HVAC returns, attic or wall voids | Airborne dust from disturbed material | Don't vacuum or sweep; wet-clean and check for access points |
| Children's rooms or pet feeding areas | Contact exposure and contaminated bedding or bowls | Wet-clean surfaces and wash bedding and bowls |
| Droppings that return after cleaning | Ongoing rodent activity | Schedule an inspection and treat as an active infestation |
Why the location column drives everything
Droppings near food or food-contact surfaces get handled today. Bag what's exposed, wipe the shelf, disinfect, and hold off restocking until the surface is dry. Droppings near an HVAC return or in a wall void are an air problem before they're a surface problem, because every air cycle can pull disturbed particles into rooms you haven't touched. The cleanup there has to keep material wet and contained.
Rooms where children play or pets eat add a contact pathway. Bedding, stuffed animals, bowls, and floor mats all need a wash cycle; wiping the shelf alone leaves the exposure sitting where hands and mouths reach it. Droppings that reappear after a correct cleanup point to an active population, and no amount of surface work changes that.
Contamination of this kind sits on a spectrum with other household hazards. A guide to sewage backup health risks covers the parallel case, where the category of mess matters less than the surface it reached and how the cleanup was handled. Same logic, different source.
What sets your next step: where the pellet landed and how it can reach you. The species guess can wait.
If a room has been heavily contaminated, or someone with asthma or a compromised immune system shares the space, get an assessment rather than a trash bag and a Saturday afternoon.
How to Clean Droppings Without Spreading Dust
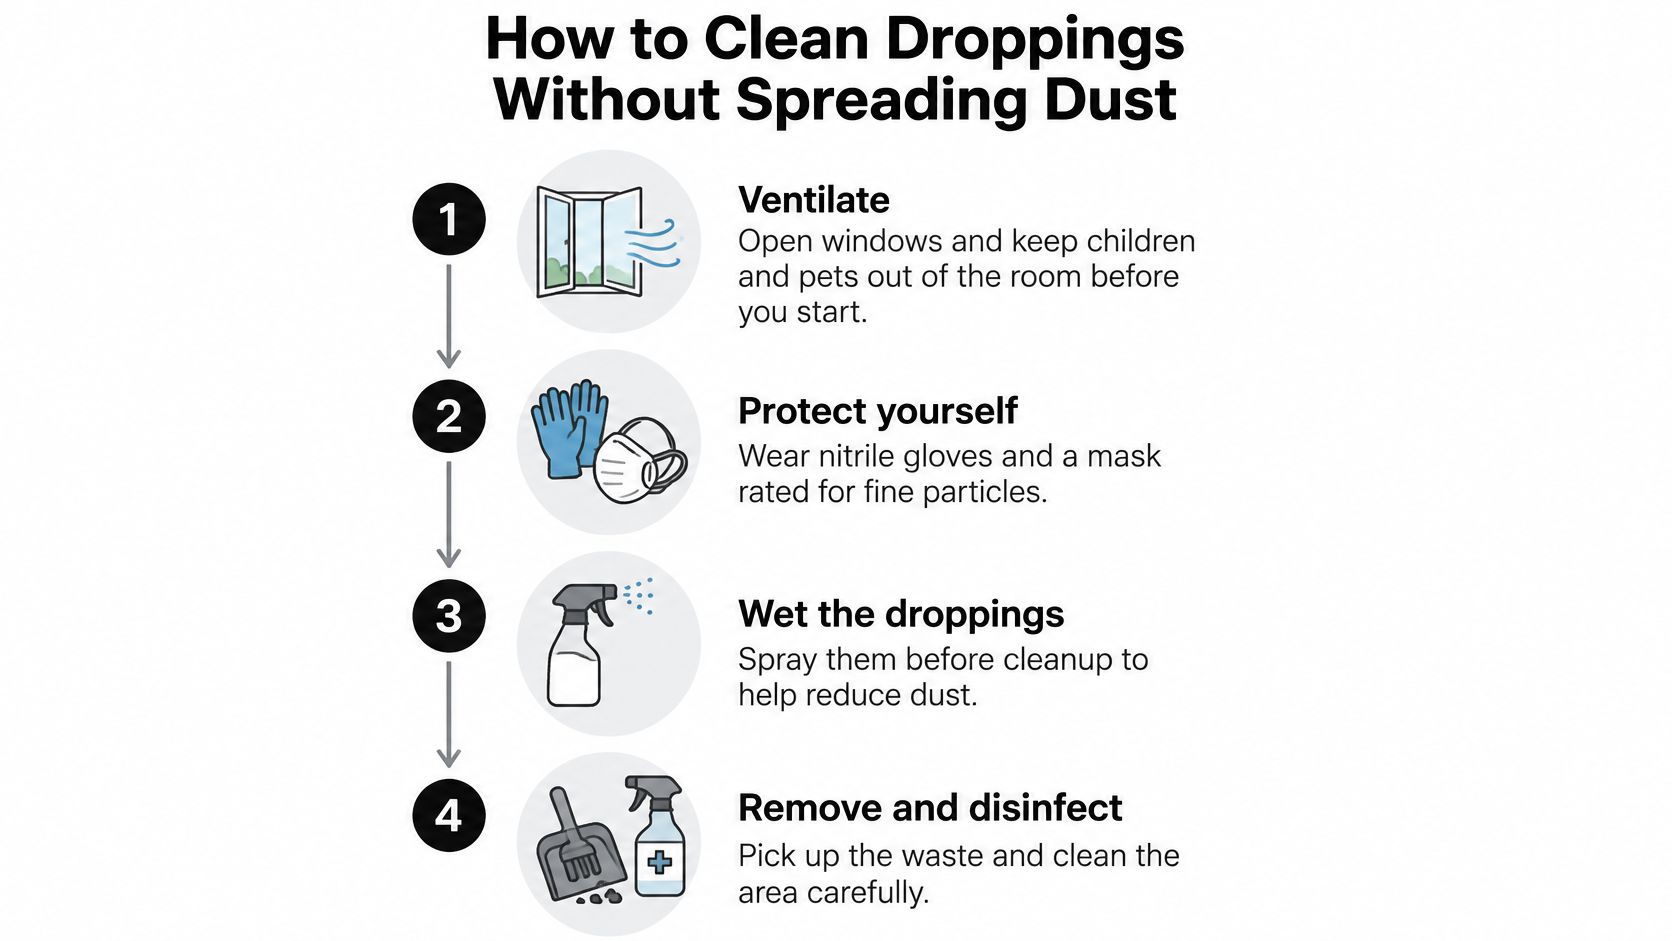
The single worst thing you can do is attack the pile with a broom. Dry sweeping and vacuuming lift contaminated particles into the air where they hang and get inhaled, and a standard shop vacuum blows fine dust straight back out. Wet it down first, then remove it, in this order.
- Ventilate first. Open windows and doors and keep children and pets out of the room for the duration. You're reducing the concentration of anything already airborne before you add to it.
- Protect yourself. Nitrile gloves on, plus a mask rated for fine particles. A dust mask from a painting project is fine. A t-shirt pulled over your nose is not.
- Wet the droppings before you touch them. Spray with an EPA-registered disinfectant or a bleach solution mixed to about 1.5 cups of bleach per gallon of water, and let it soak for roughly five minutes so saturated droppings can't shed dust. Whatever product you reach for, its label controls the dilution and the wet contact time, so read it before you spray rather than mixing from memory.
- Wipe from the outside in. Use paper towels and work from the edge of the contamination toward the center, so you're not dragging material across clean surface.
- Bag and seal. Towels, gloves, and debris go into a sealed plastic bag, then straight into an outside bin rather than the kitchen trash.
- Disinfect the surface again and wash up. Soap and water on your hands after the gloves come off, not before.
- Recheck in a few days. No new pellets on a clean surface is the only result that counts as finished.
Two situations go past a paper towel. Heavy accumulation in an attic or crawlspace, and droppings soaked into insulation, mean the material has to come out rather than be wiped. If you want to see what a full rodent infestation removal involves beyond the cleanup itself, the sequence runs inspection, exclusion, then sanitation.
If you're finding fresh material while you clean, stop and treat it as ongoing before you finish the job. This guide on how to spot infestation signs in rodent waste walks through the freshness and placement cues that tell you whether you're cleaning up history or interrupting a live pattern.
Where the contamination has spread into insulation or a wall cavity, Rodent Control from a matched local provider removes the animals, seals the way back in, and handles the cleanup of droppings and contaminated material, with insulation remediation as needed.
Finding the Entry Points Rodents Use
Cleaning without sealing is a reset button. You'll be doing the same job again in a few weeks, because the animal that made the mess is still commuting through the same gap.
The gap itself is smaller than homeowners expect. A mouse gets through an opening you'd describe as a hairline crack, and a rat needs a gap only modestly wider, so a flaw that looks cosmetic can still be a functioning door. Check door sweeps, pipe penetrations, dryer vents, foundation seams, and the space behind a kitchen cabinet against that standard, not against what looks obviously broken.
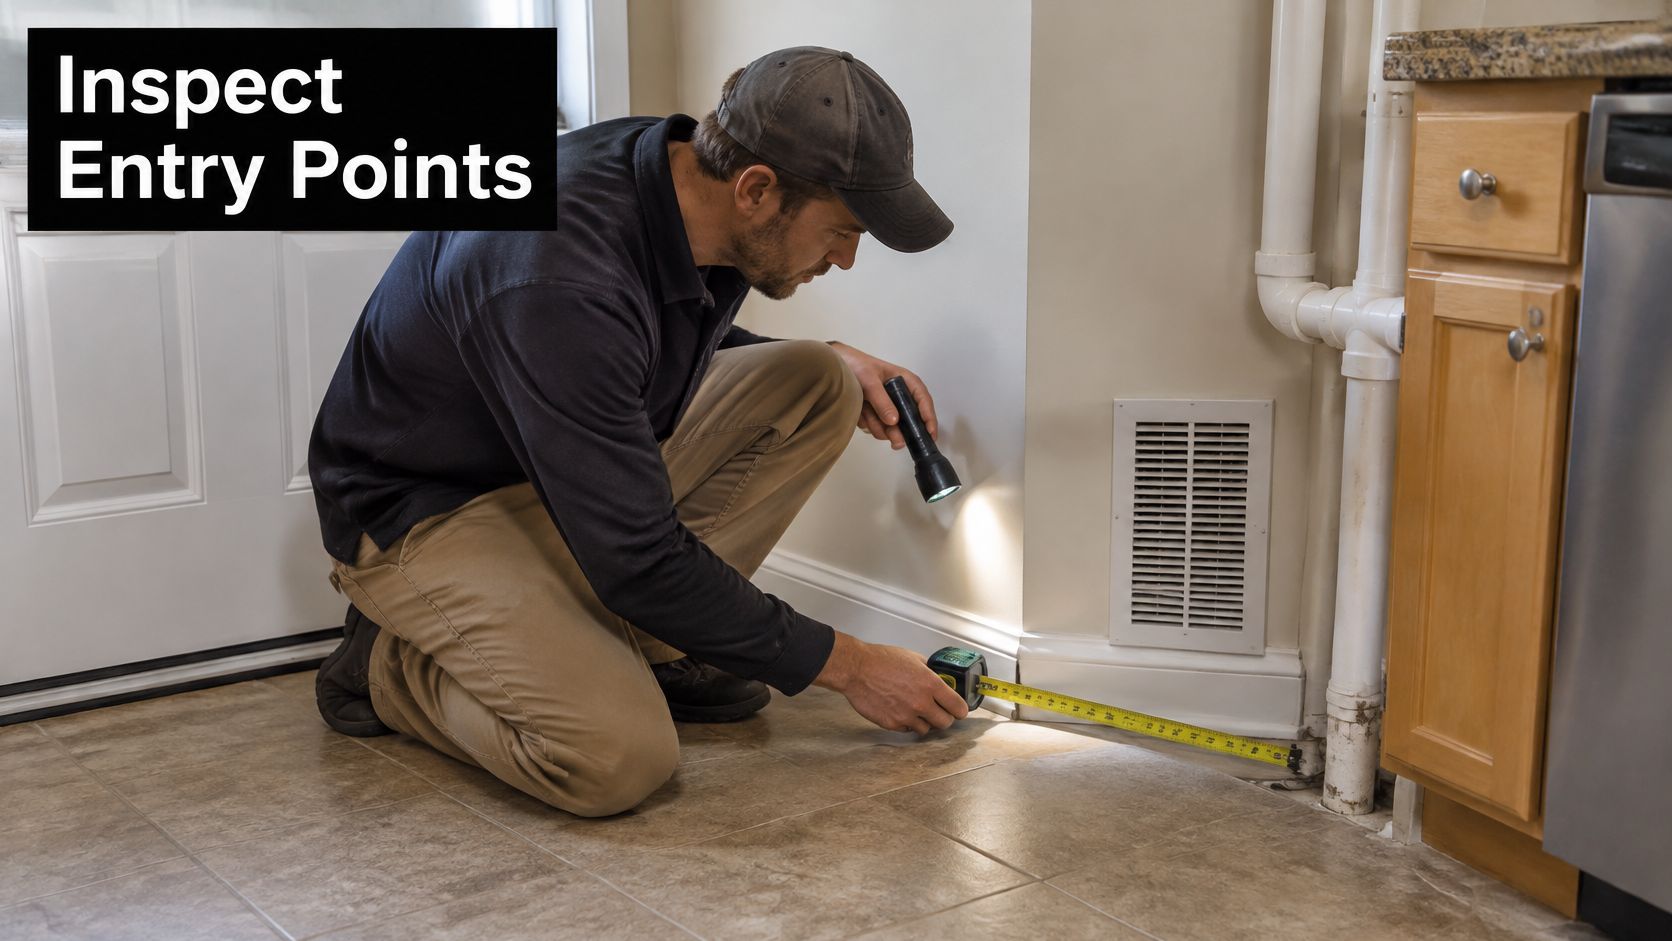
Walk the perimeter after dark
Take a flashlight out at night, when the house is quiet and the animals are moving. Pellets mark a route, but four other signs tell you which route is active right now.
- Gnaw marks on wood, plastic, wiring, and the corners of stored boxes. Fresh gnaw is lighter in color than old gnaw.
- Grease or rub marks along the base of a wall, where a body has brushed the same line repeatedly.
- Tracks in dust on a garage floor or a shelf, which show direction as well as presence.
- Nesting material such as shredded paper, insulation, fabric, or leaf litter, usually within a few feet of a void or an appliance.
Check the attic, the crawlspace, the garage, under the kitchen sink, and behind the refrigerator and stove. Those are the spaces where entry and harborage overlap, and a route that ends near nesting material matters more than one that ends in open air.
Sequence the sealing around what the signs tell you. Pack coarse steel wool into gaps around pipes and behind cabinets before covering it with sealant, since rodents chew through foam readily, fit door sweeps with no daylight underneath, and cover vents with metal mesh. Leave the route showing the freshest sign for last and deal with it only once the animals inside are out, because sealing an active entry traps them and pushes them to gnaw a new one. If you want to watch the process first, this video walkthrough of an entry-point inspection shows what a technician checks and in what order.
When the sealed house still produces fresh droppings, you missed a route, and the less obvious paths are usually the culprit. Rooflines where a branch overhangs, gaps at utility penetrations, and openings hidden behind siding rarely show up on a first walk. This breakdown of how rats get into a house covers the routes most homeowners skip.
When a second careful pass still doesn't produce an obvious gap, a professional inspection identifies the species, the nesting areas, and every likely entry point rather than the first one that looks suspicious.
Call a Licensed Pro When Droppings Keep Returning
There's a point where the do-it-yourself loop stops paying. I'd set it at these markers: droppings reappear after a proper clean and a genuine sealing effort, pellets show up in food or on food-contact surfaces, nesting material turns up in insulation, or activity shows in several rooms within the same week. Any one of those moves the job from maintenance to treatment.
A licensed provider should do four things, and you should be able to name them before you agree to anything. Inspection to identify the species and the entry points. Trapping and removal of the rodents currently inside the structure. Sealing of gaps, vents, rooflines, and utility penetrations so they can't come back. Insulation remediation where it's been soiled.
Ask this before you sign: show me the entry points you found, and tell me how you'll seal each one.
That request does two things. It confirms the provider inspected rather than quoted from a script, and it gives you a checklist to verify at the follow-up.
One clarification matters for anyone comparing options. The inspection and treatment are performed by the matched third-party provider, not by Pestless, which is a free referral service. There's no cost to ask, and quotes come with no obligation.
The work you can do this week is small and decisive. Run the ruler test on five pellets. Clean one area properly and mark it. Photograph what you find with a date. If new droppings appear on that marker, you have current activity and a documented case to hand to a professional.
Pestless Inc. connects Miami and Miami-Dade homeowners with licensed, insured pest control providers who inspect for entry points, remove rodents, and clean up contaminated material, including insulation where it's been soiled. If droppings have returned after your own cleanup, describe what you found and let a vetted local pro confirm the species and the access routes. Request a free, no-obligation quote at Pestless Inc. and get the problem read by someone who inspects rodent sign for a living.
Dealing with this pest right now?
Pestless connects you with a licensed, insured Miami pest control provider for a free, no-obligation quote.